Learn with me · pencil drawing
How to draw an easy kawaii cat step by step
Let’s draw this kitten by starting with something very simple: an oval. Keep your eraser nearby and use light pencil pressure; I will guide you as we gradually find the shape.
I work from large shapes to small details: first I build the head and body with simple forms, then add the face and details. Join me whether you are young and just starting or an adult who would like to draw again.
- For beginners
- 10 illustrated steps
- Pencil and paper
The materials I usually use
What you need to draw this cat
For drawings like this, I usually use a 0.3 mm Pentel Graph 1000 For Pro mechanical pencil with HB lead. I find it comfortable for building shapes and adding details. Follow this tutorial with whichever pencil you have; it does not need to be the same one.
- Pencil or mechanical pencil. If using a wooden pencil, I recommend a well-sharpened one from 2H to B. HB is a good starting point.
- Kneaded or precision eraser. I usually use a Staedtler kneaded eraser to lighten the sketch gradually; a precision eraser also helps with small lines.
- Sketch paper. Sketch paper is enough to practice drawing. If you plan to color it afterward, choose paper suited to your intended materials from the start.
- Pencil sharpener, if you will use a wooden pencil.
If you want to finish with colored pencils, see my guide to choosing paper for colored pencils.
Before starting: draw lightly and build the shape
My most important advice is this: do not press hard with the pencil. The first lines are guides, and some will disappear. If you make them too heavy, they are harder to erase without leaving marks.
When I cannot draw a curve in one stroke, I build it with several short strokes. Then I lighten it with the eraser and go over the line that works best. Correcting is part of drawing.
Steps 1–5 · Ovals, ears, paws and tail
Build the base
I leave the details for later. First, I want the cat to rest on a set of simple shapes.
Step 1 of 10
I start with an oval for the body
I begin with a small vertical oval just below the center of the page. This will be the body base. I leave plenty of room above it because this kitten’s head will be large.
I make it slightly narrower at the bottom. This shape is only a guide: later, I will turn it into the cat’s chest and legs.

Step 2 of 10
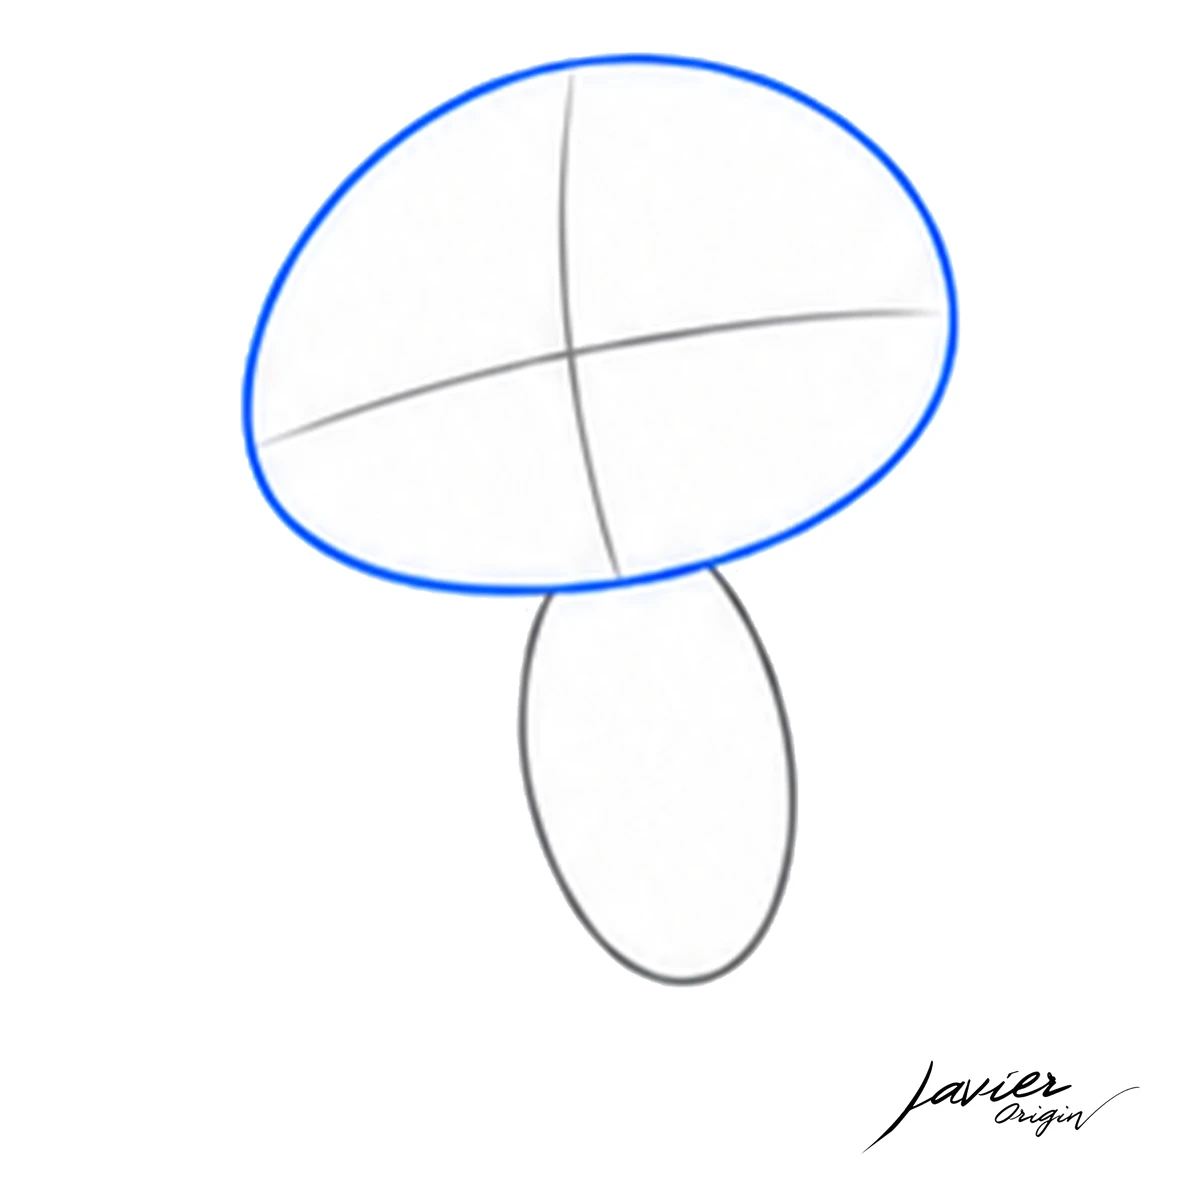
I draw the head and its guides
Above the body, I add a much wider oval for the head. I tilt it slightly, as shown in the image. The large head and small body are the basis of the cute expression I want.
Inside, I mark a line from top to bottom and another across the face. Their intersection helps orient the face: the vertical line marks the center, and the crosswise line helps position the eyes.
Step 3 of 10
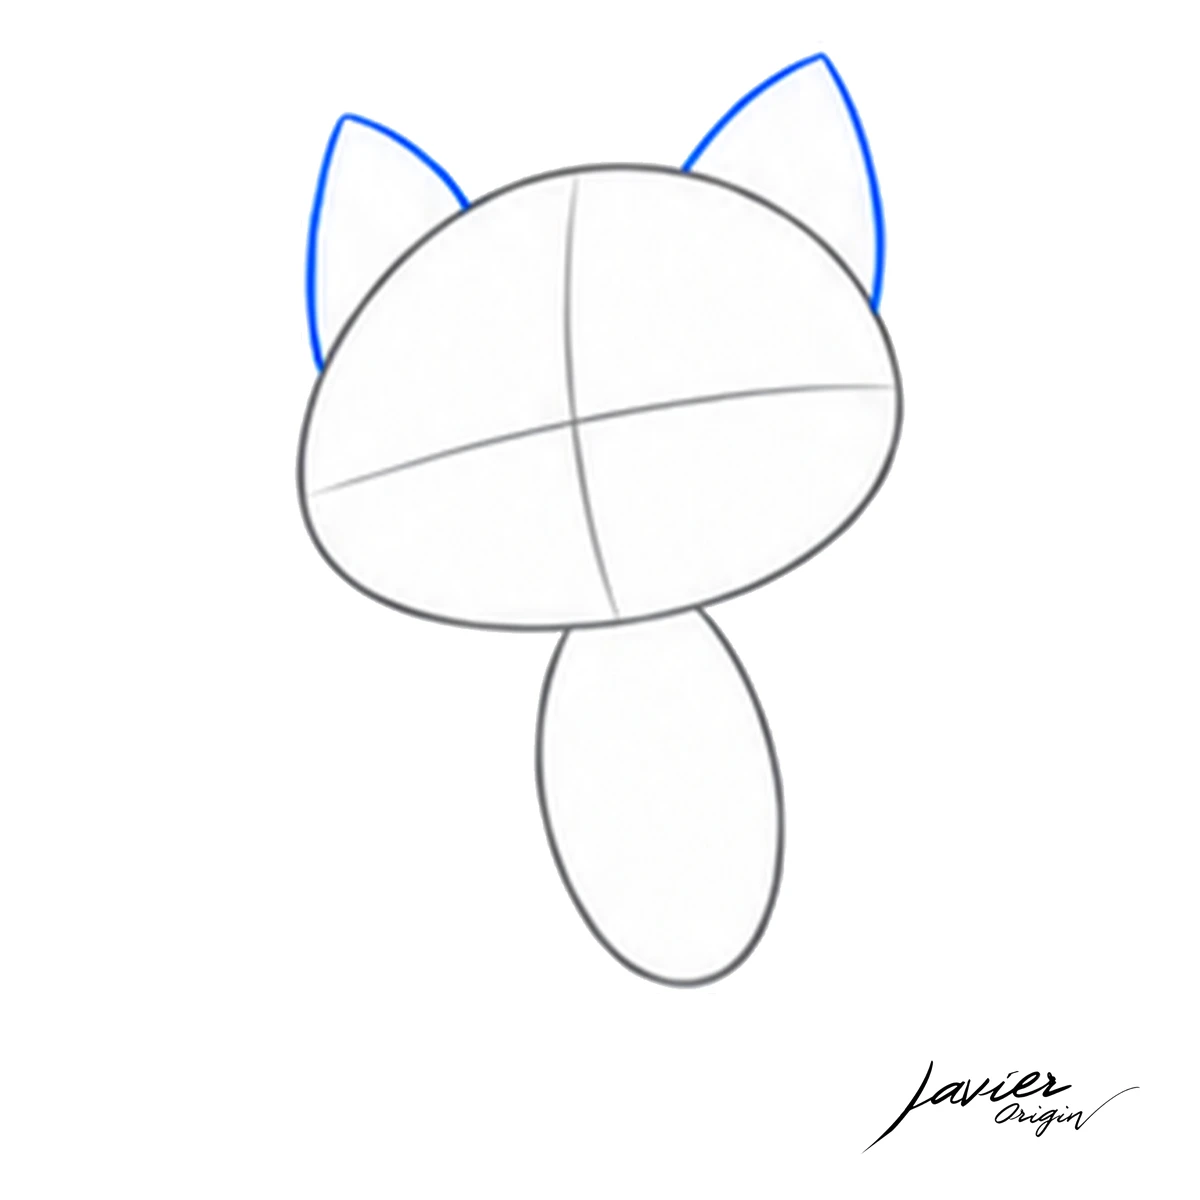
I add the two ears
Now I place an ear on either side of the top of the head. I use two triangles but soften their sides so they do not look like stiff spikes.
Because the head is tilted, I do not try to place the tips at the same height. I look at the whole shape before moving on to the paws.
Step 4 of 10
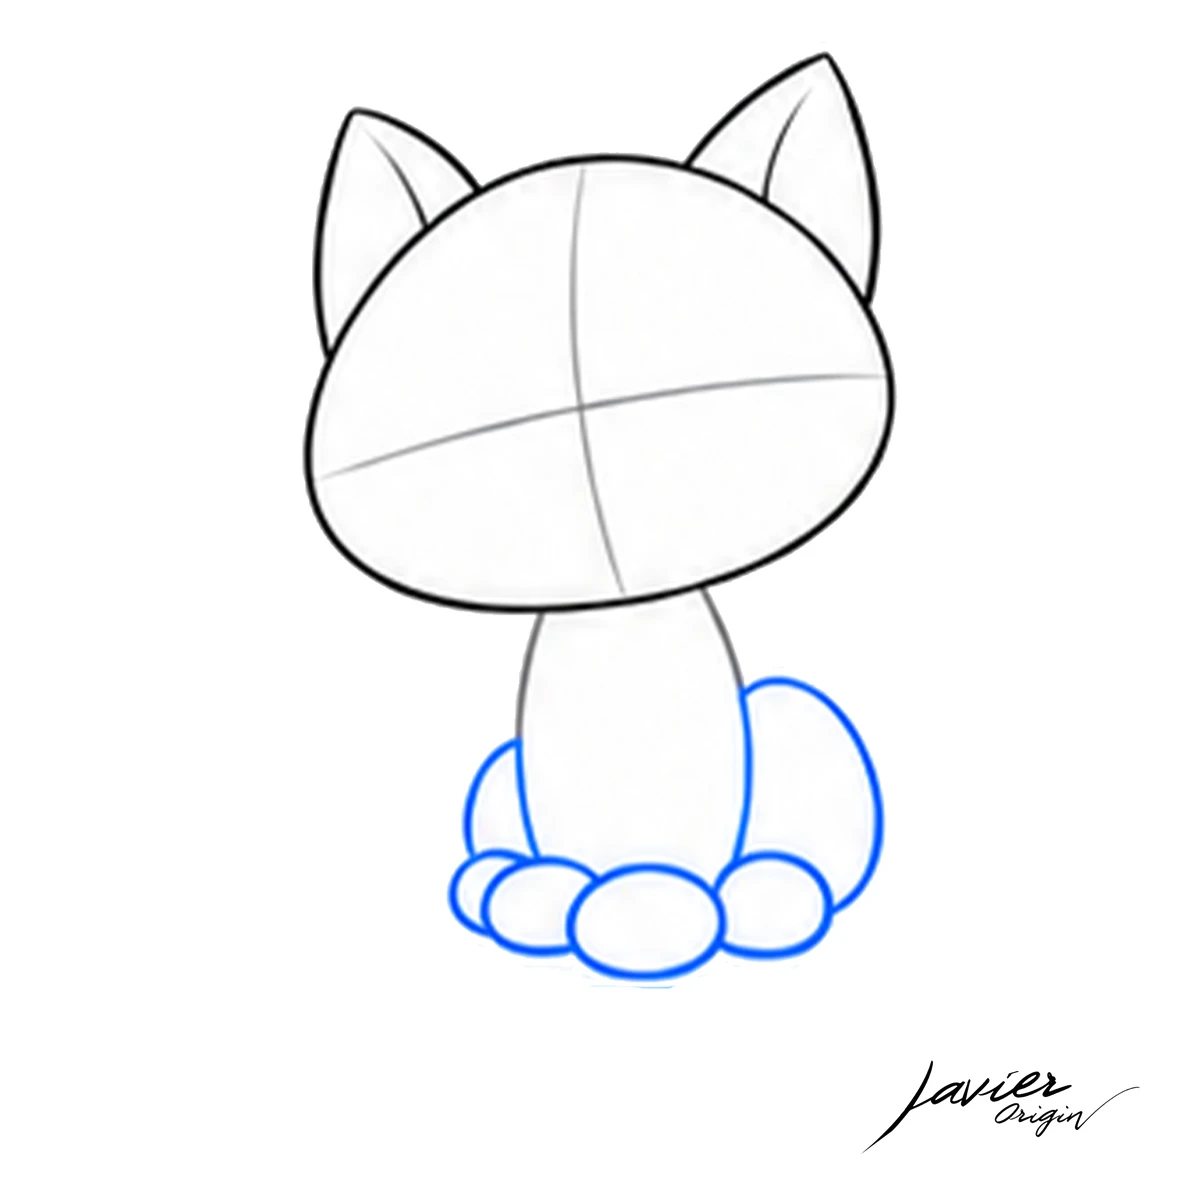
I position the paws and seated pose
At the base, I draw small ovals to position the paws. On either side of the body, I add two curved shapes to build the hind legs and seated pose.
These are still supporting shapes, not the final outline. In this image, I also add a curved line inside each ear, following its outer edge. I group the paws beneath the chest to keep the pose compact.
Step 5 of 10
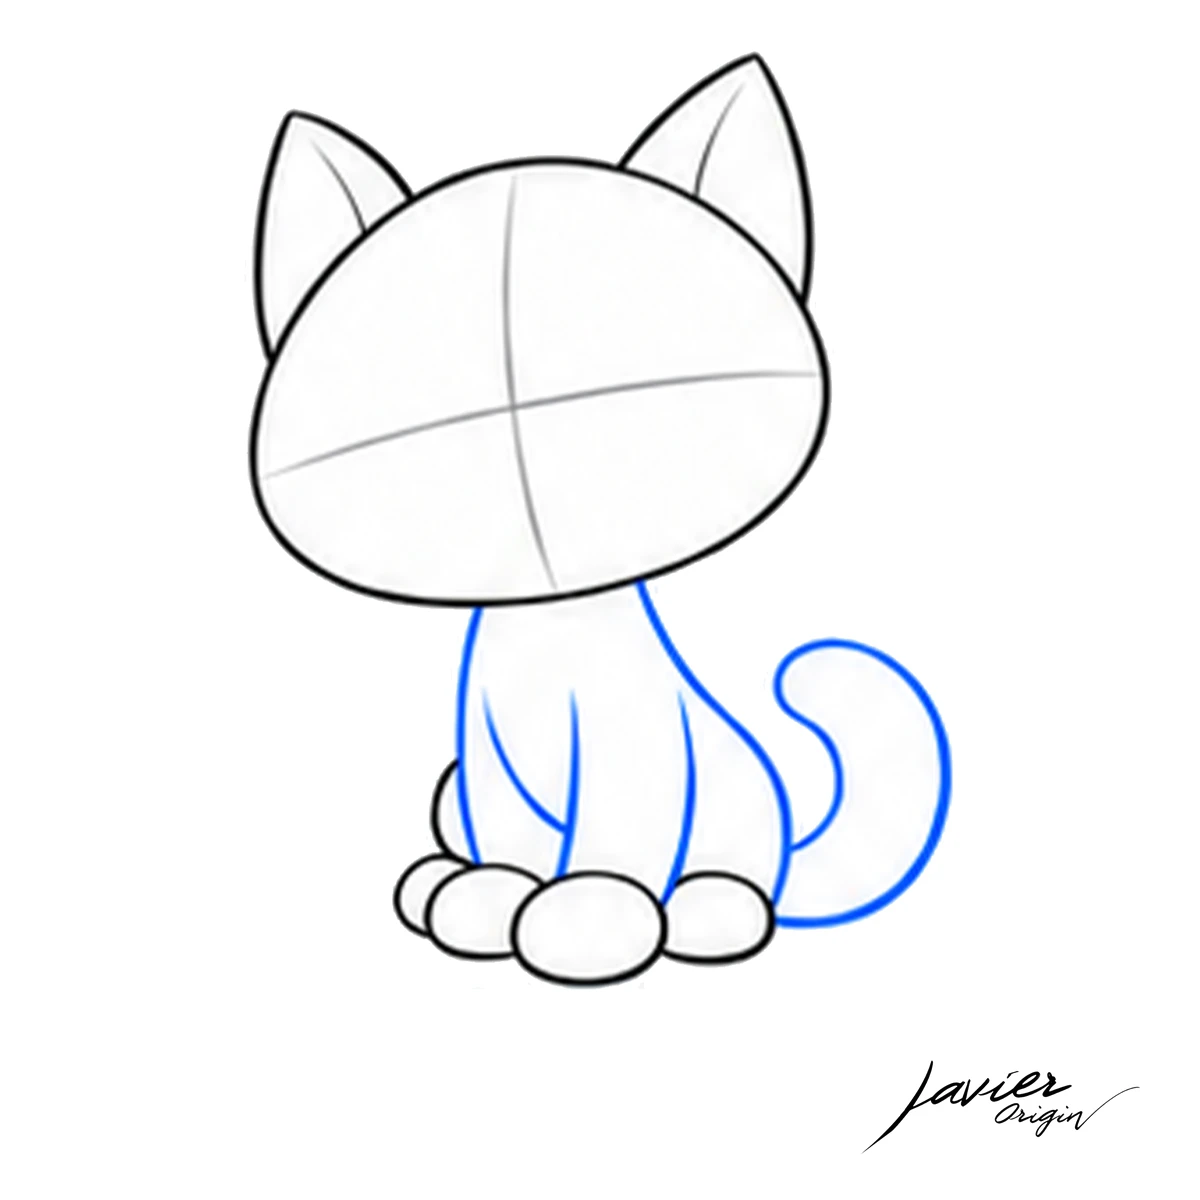
I define the body and draw the tail
I use the first oval to draw the chest and front legs. I draw curves down from the head to the paws and round out the side. I erase sketch lines I no longer need.
On the right of the image, I add a tail that rises and curves inward. I draw two separated lines and join them with a rounded tip. I leave space around the tail so it does not stick to the body.
Steps 6–8 · Fur, eyes and smile
Give it expression
Its personality starts to appear here. A small change in the eyes or eyebrows can change the whole expression.
Step 6 of 10
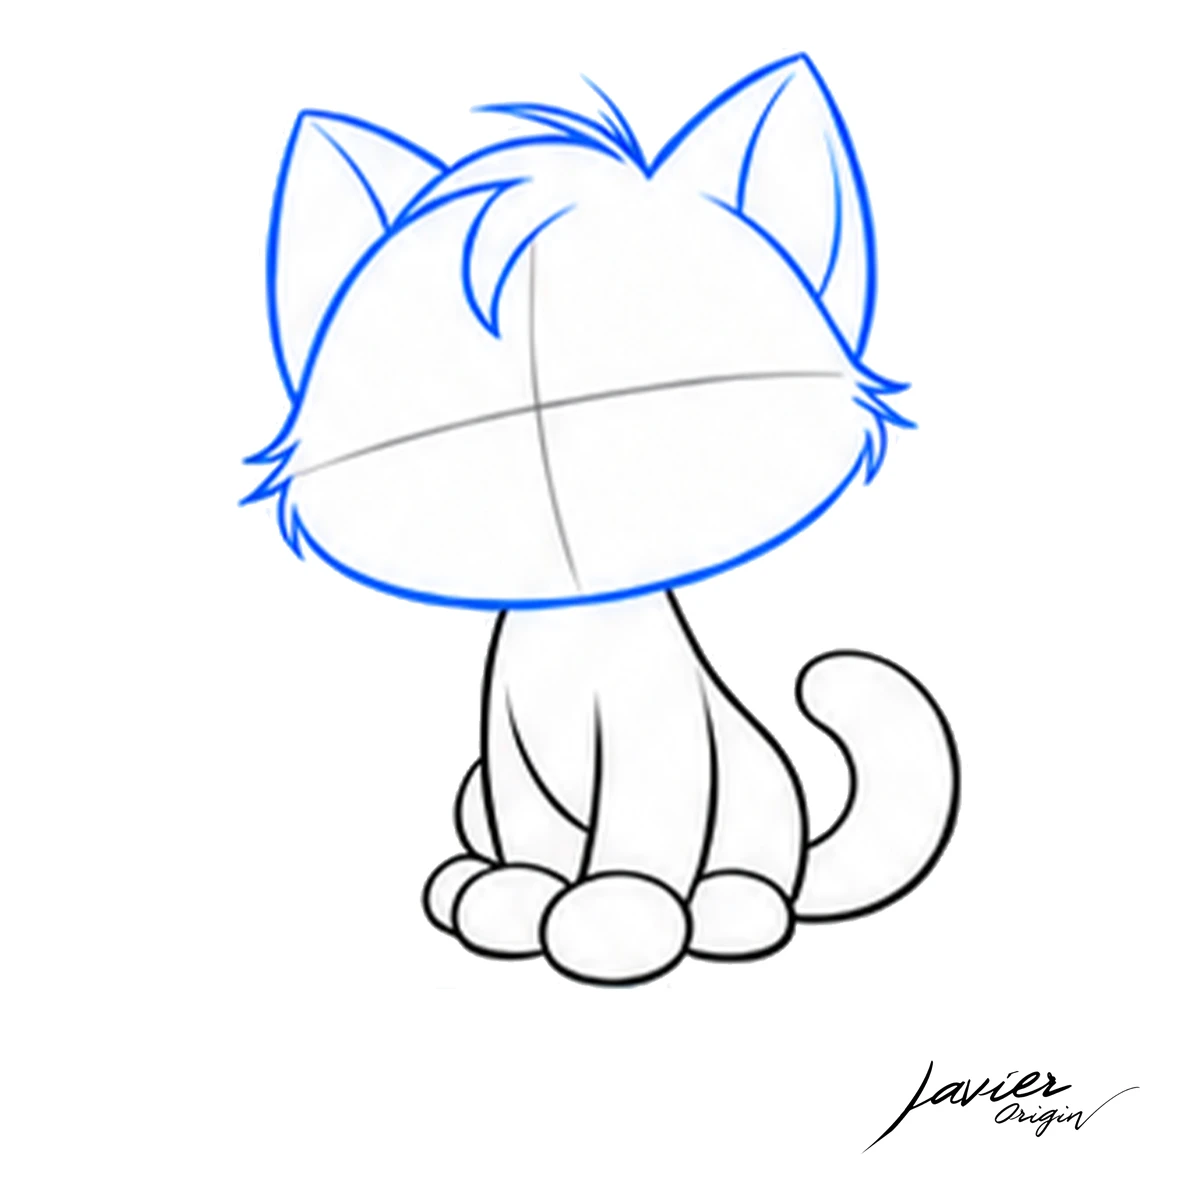
I shape the tufts of fur
To give it personality, I draw a tuft falling over the forehead and small fur tips at the sides of the face. I alternate curves with soft points without filling the entire outline with little strokes.
I gradually replace the oval edge with the head silhouette. I keep the face guides because I still need them.
Step 7 of 10
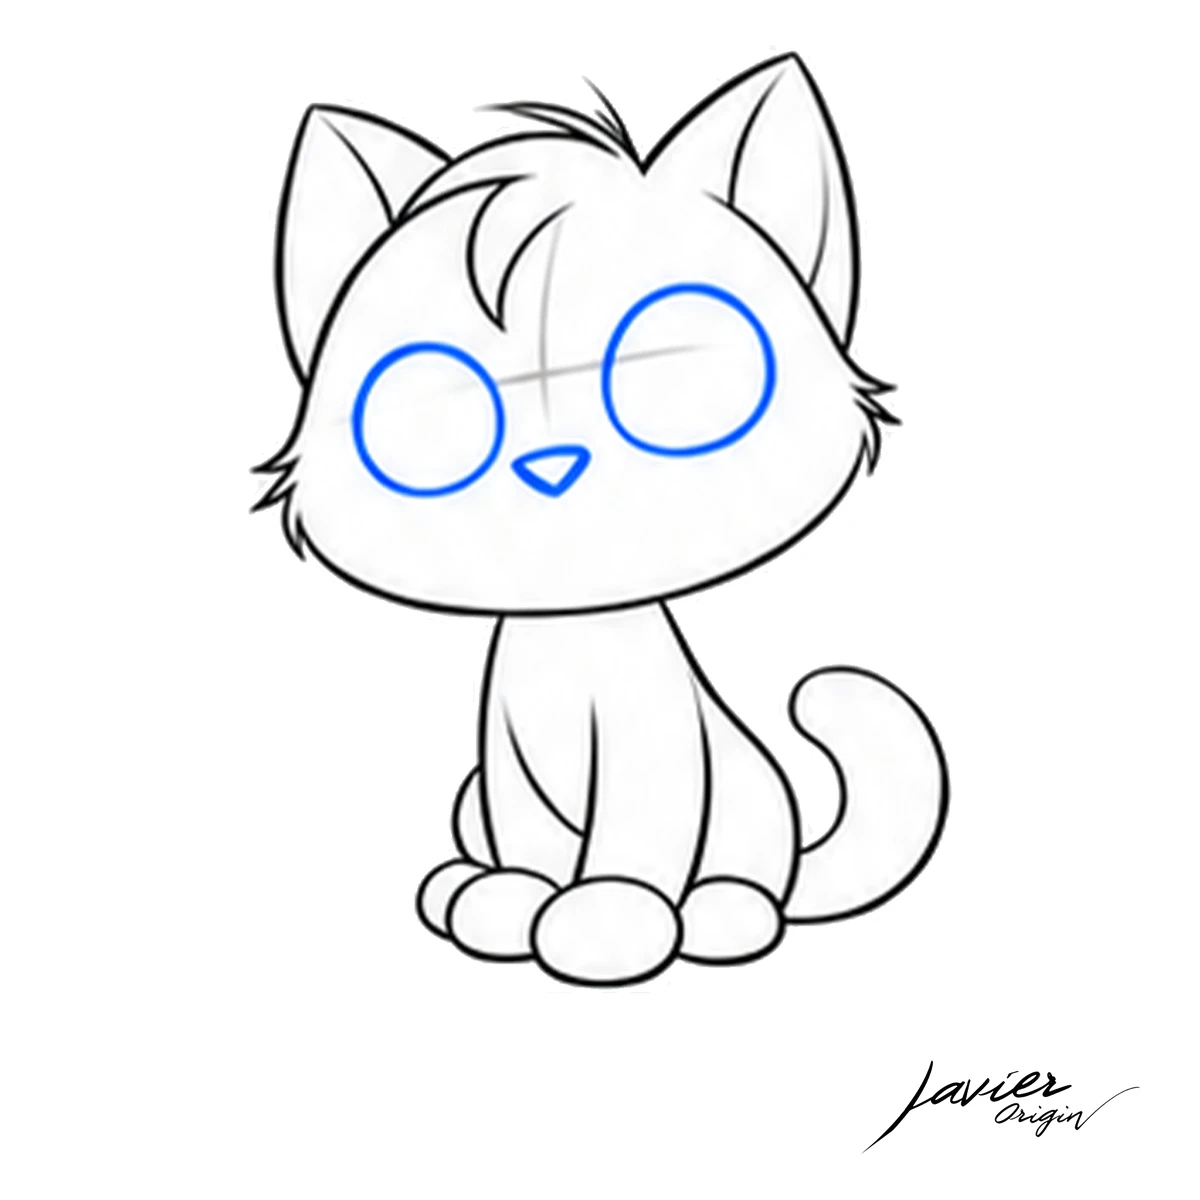
I place the large eyes and nose
I draw two large eyes, one on either side of the central guide. I use the line across the face to align them with the head’s tilt. They do not need to be perfect circles.
Between the eyes, slightly lower down, I add a small rounded triangular nose. Before going over the lines, I check the space between the eyes and whether the nose is centered on the face.
Step 8 of 10
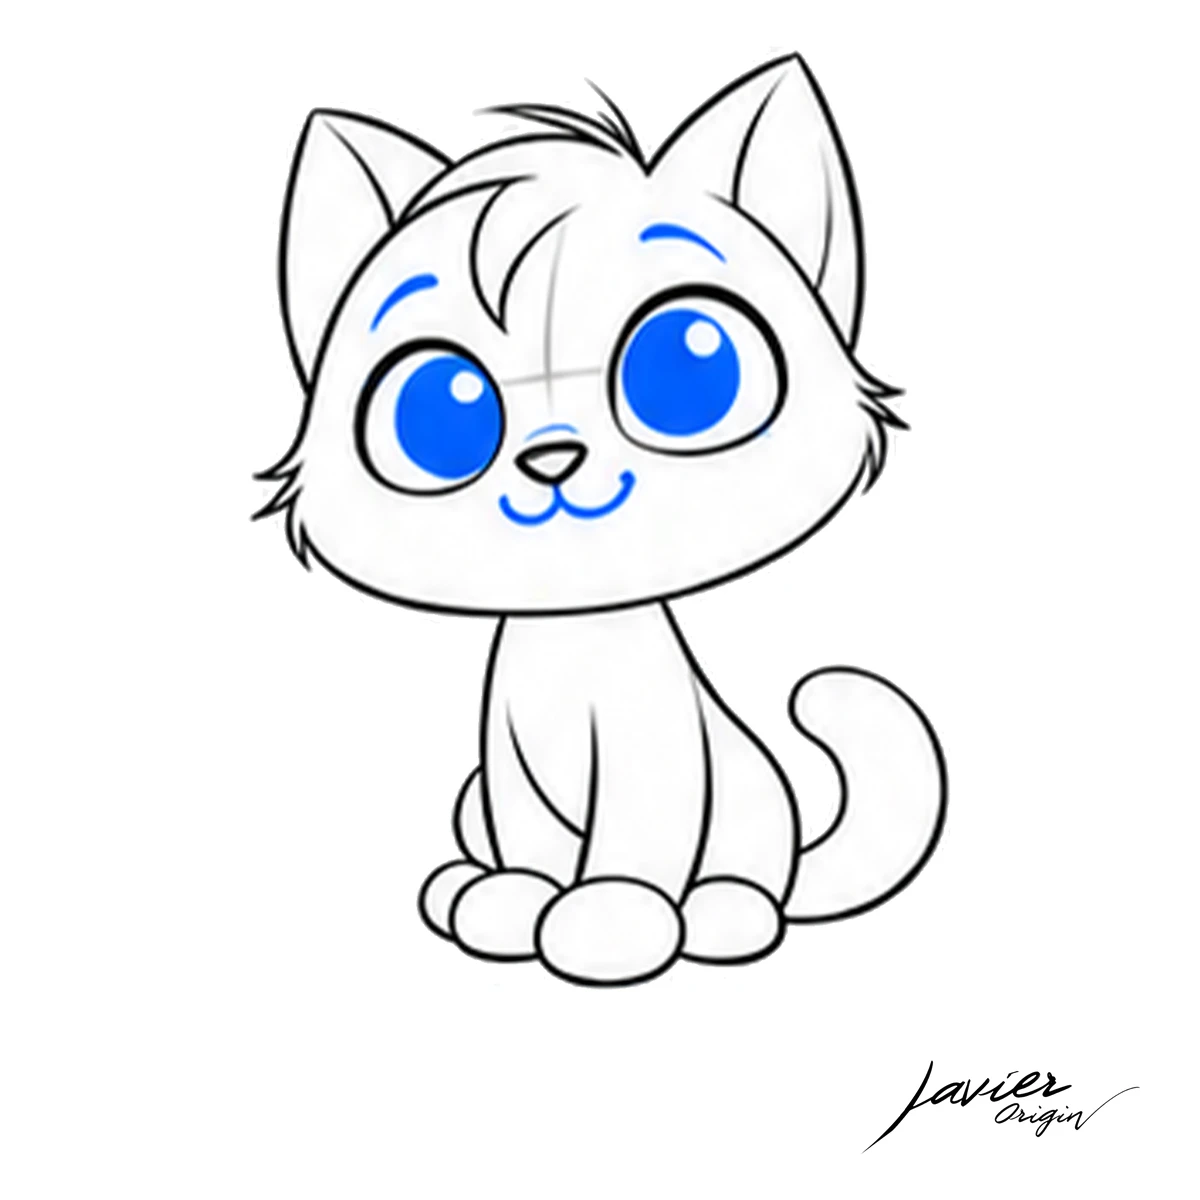
I give it expression through the eyes and smile
Inside each eye, I draw a dark rounded shape and preserve a small white circle for the highlight. I place both highlights toward the same side. This detail makes the gaze livelier.
Beneath the nose, I draw two small curves for the mouth. I add gently shaped eyebrows. Some guides are still visible in this image. Keep them until you check the eye positions, then erase them gently before adding the bow tie. You can fill your eyes with graphite; the blue in these images highlights this step’s new lines.
Steps 9–10 · Bow tie, whiskers and finish
Final details
Our kitten is here. Now I add a few details and clean up the sketch while preserving the softness of the lines.
Step 9 of 10
I draw a bow tie beneath the head
Beneath the head, I draw a small knot and a rounded shape on either side for the bow tie. I add short lines extending from the knot to suggest folds.
I erase the body lines hidden behind the bow. If you prefer an even simpler cat, leave out the bow tie: the expression is already established.
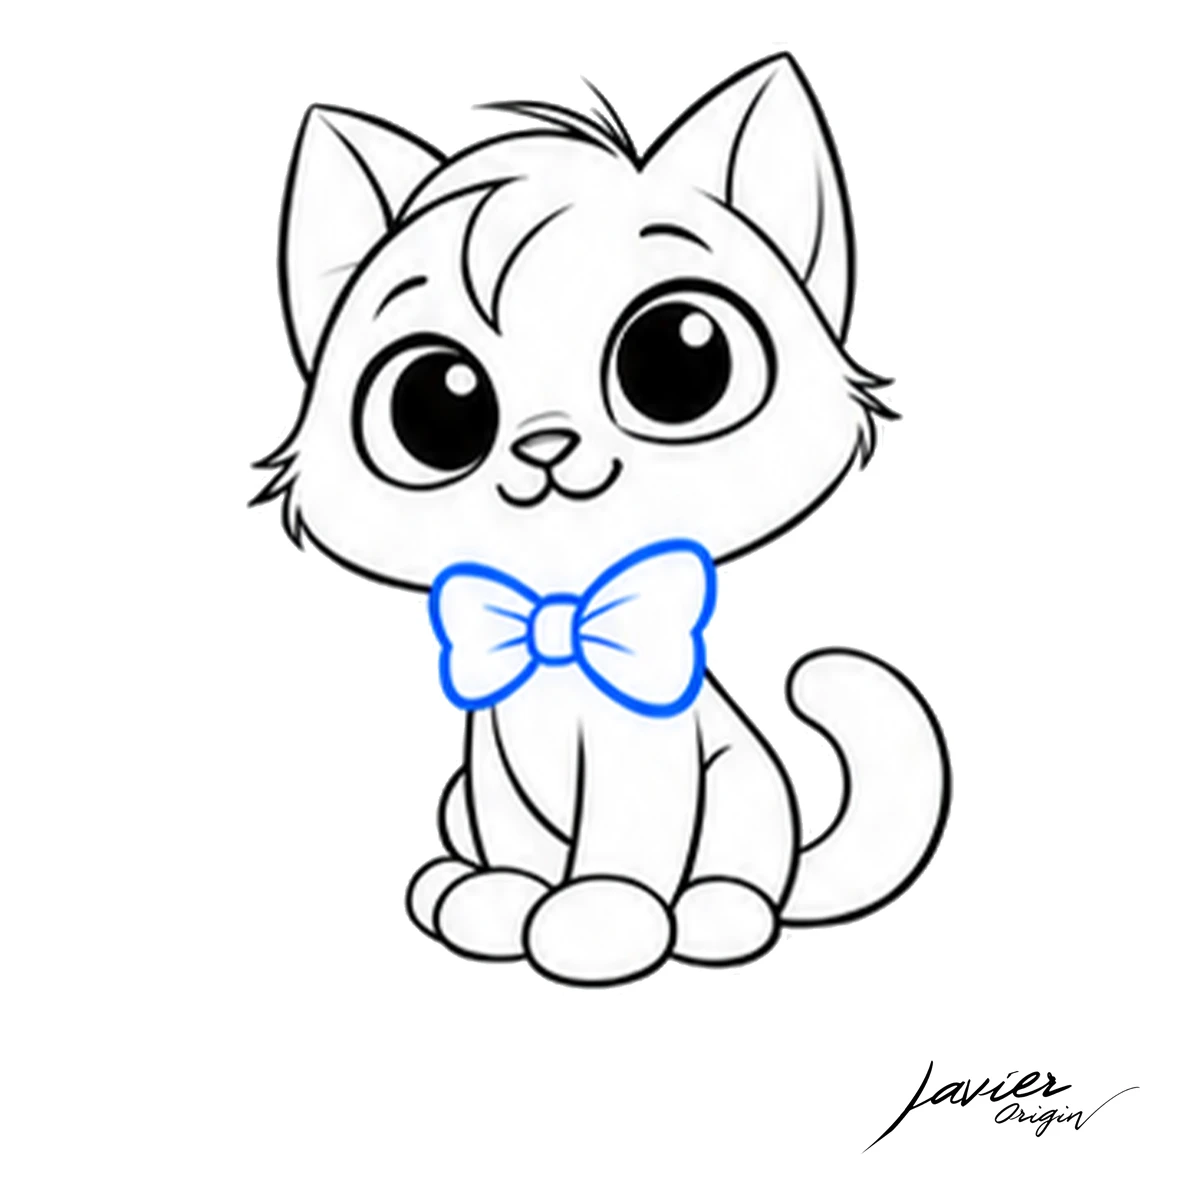
Step 10 of 10
I finish with whiskers and clean up the drawing
To finish, I add whiskers, small paw marks and curved stripes on the tail. I also draw a few fur details inside the ears. I keep the whiskers light so they complement the face.
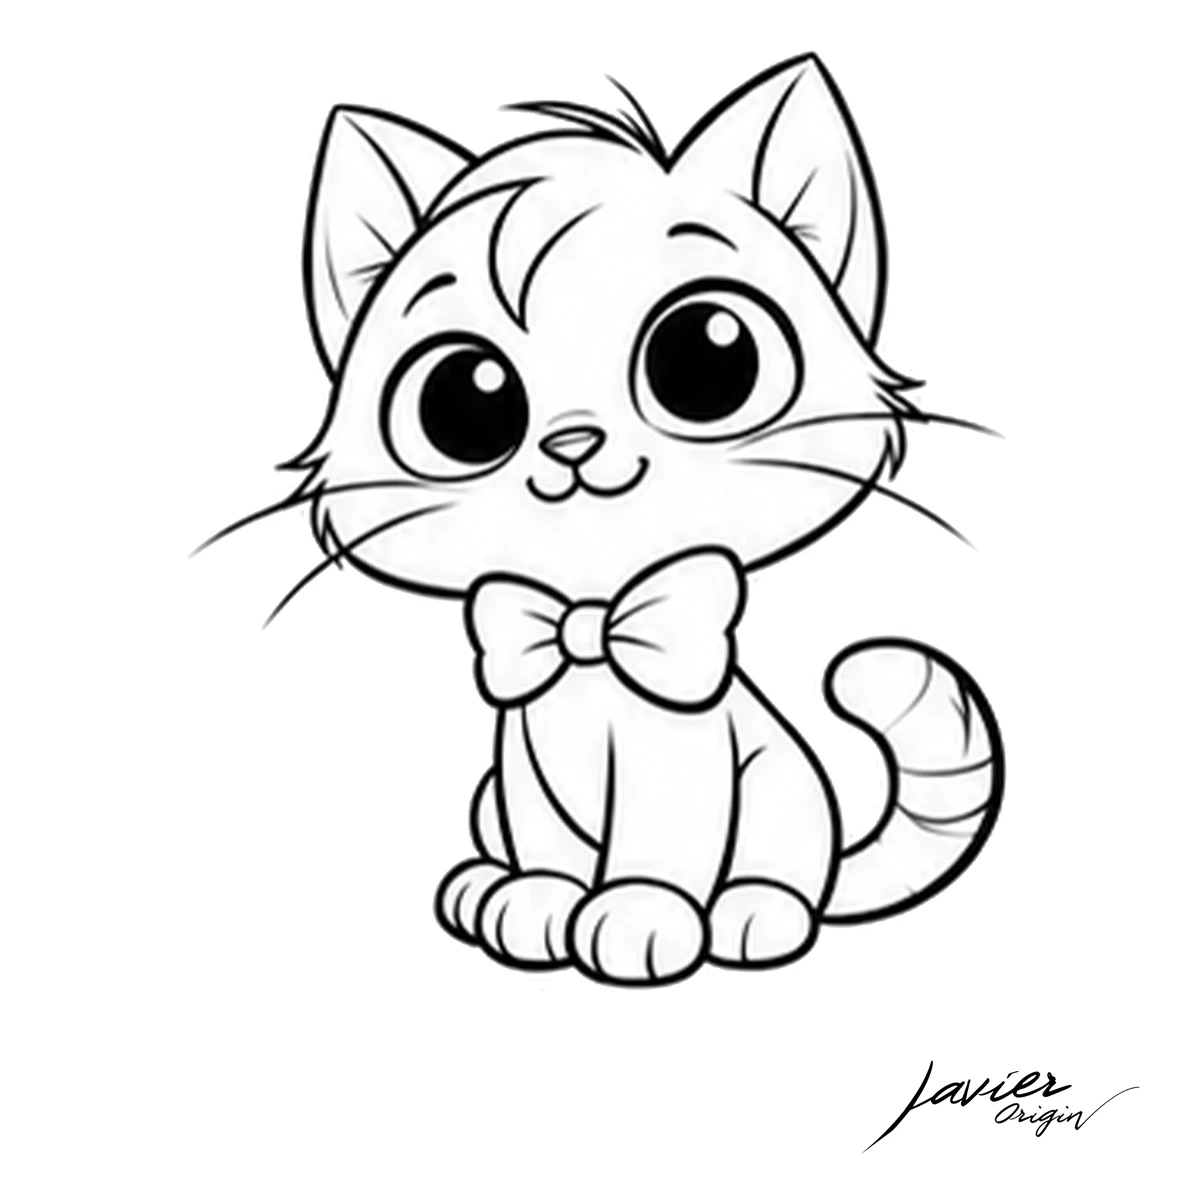
I review the outline and check for construction lines crossing the face or paws. The kawaii cat is ready. Before coloring, I check that the paper suits the materials I will use.
Would you like to add color? I have prepared a printable coloring page of this same cat. Before starting, check that the paper suits your pencils.
For ideas on choosing shades, explore my colored pencil Atlas (in Spanish).
Draw it again and notice your progress
Try drawing this cat several times. On your next attempt, focus only on the head-to-body relationship; on another, give the eyes more attention. This helps you see what feels easier and what needs practice.
Now draw it again with a different expression. Tilt the head a little more, move the eyebrows or try another tuft. Keep both drawings: comparing them helps you recognize what you have learned and decide what to practice next.
If something does not work the first time
What if the head looks crooked?
In this example, the head is slightly tilted. If you do not like your drawing’s tilt, lighten the oval with the eraser and adjust its shape before adding the eyes. I review this base before spending time on details.
How do I make the eyes look in the same direction?
I follow the guides and place the dark part of both eyes toward the same side. I also leave the white highlights in similar positions. These shapes are easier to correct before filling them.
Do I need to draw every tuft and the bow tie?
No. If you are starting, use just the head, ears, body and face. I add the tuft and bow tie for character, but you can include them when you feel more comfortable.
Can children follow along?
I have divided the drawing into simple shapes for children and adults to follow. If a step is difficult, repeat that shape in a corner of the page before continuing. You do not have to finish everything at once.
When do I erase the guides?
I keep them until I have placed the features that depend on them. Then I remove them gently and refine the outline. With a kneaded eraser, dab lightly to lift graphite without much rubbing.
Leave a Reply
You must be logged in (Español) to post a comment.