Learn with me · step-by-step drawing
How to draw an easy anime girl step by step
Learn to draw this anime girl in 13 illustrated steps, from the head shape to the eyes, bangs and hoodie. Follow along with a pencil and eraser, even if you are just starting.
Blue lines show what I add at each step. Draw at your own pace and correct the guides before going over the finished lines.
- Face and expression
- Bangs and hair clip
- 13 illustrated steps
From sketch to finished drawing
Choose a stage to see how I draw it.
Try it on paper
Simple materials to get started
You do not need anything special for this tutorial. When drawing characters like this on paper, I usually start with a fine-tip mechanical pencil with HB lead to make gentle guides. Any well-sharpened pencil from 2H to B will also work.
To lighten the guides, I like to use a kneaded eraser. A precision eraser helps when cleaning up the eyes and hair strands. Sketch paper is enough for practice; if you want to color the drawing afterward, choose paper suited to your technique.
Before drawing the eyes
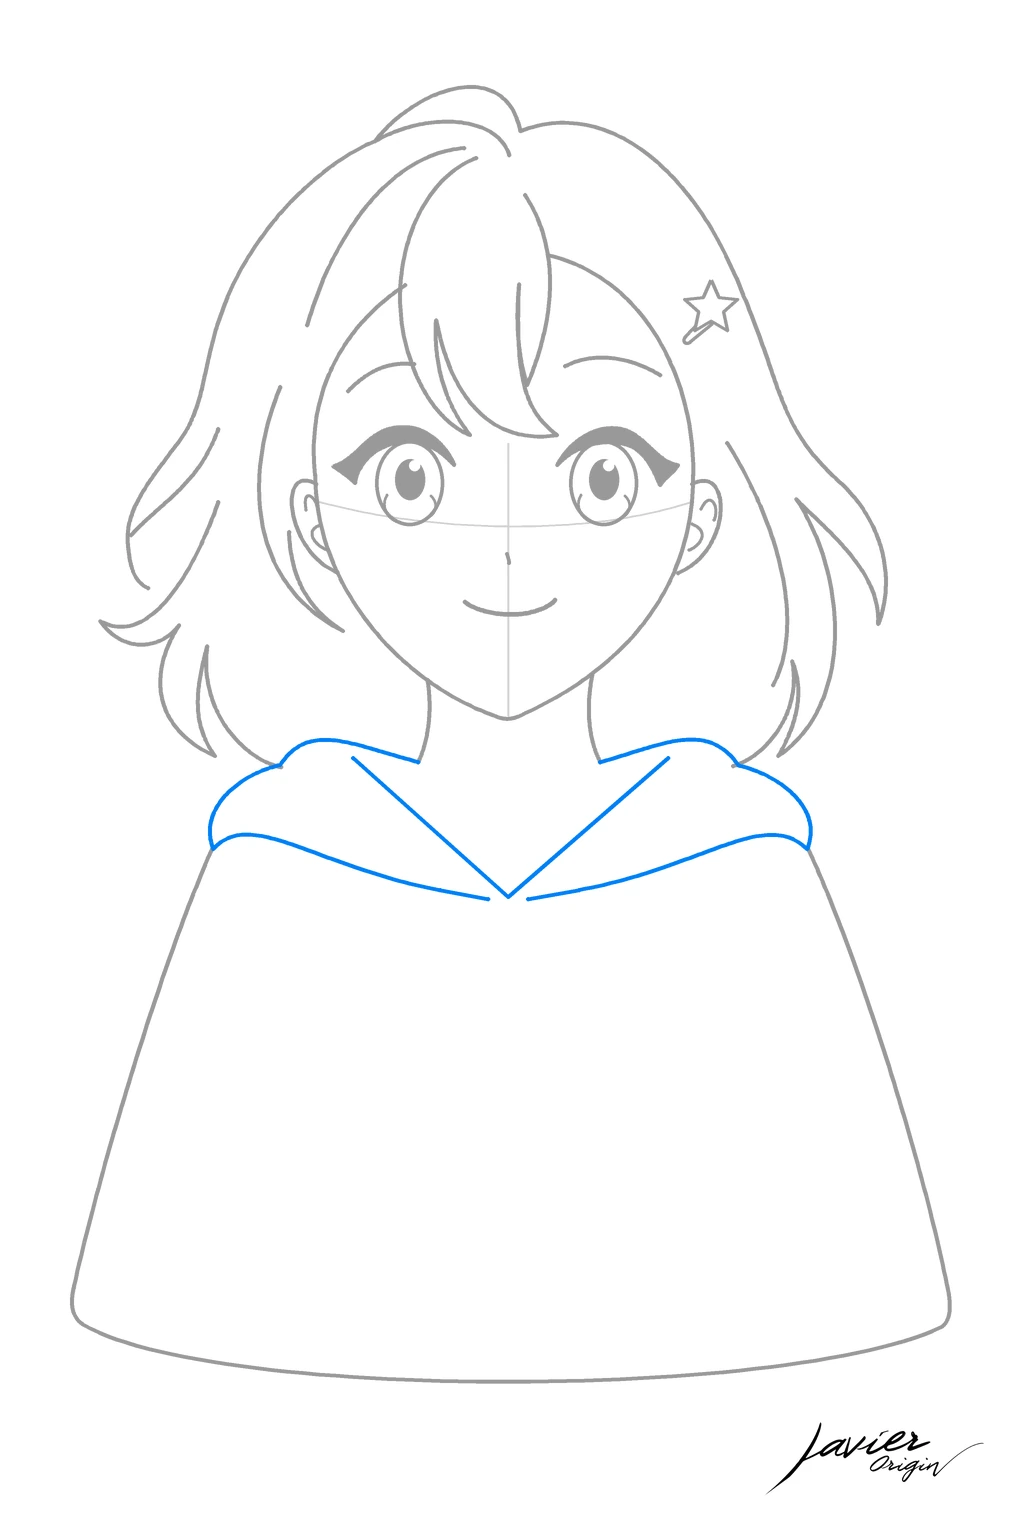
Make the first lines with light pressure. The vertical guide helps center the face, and the horizontal curve helps position the eyes. From steps 1 to 12, blue marks the new lines while earlier lines appear lighter. Step 13 shows the finished drawing without blue marks.
If a curve does not come out in one stroke, build it with short strokes. Then lightly erase what you do not need and go over the shape you want to keep. I would wait until both eyes are positioned before erasing the face guides.
Steps 1–3
The silhouette
I find the head shape and leave room for the hair.
Step 1 of 13
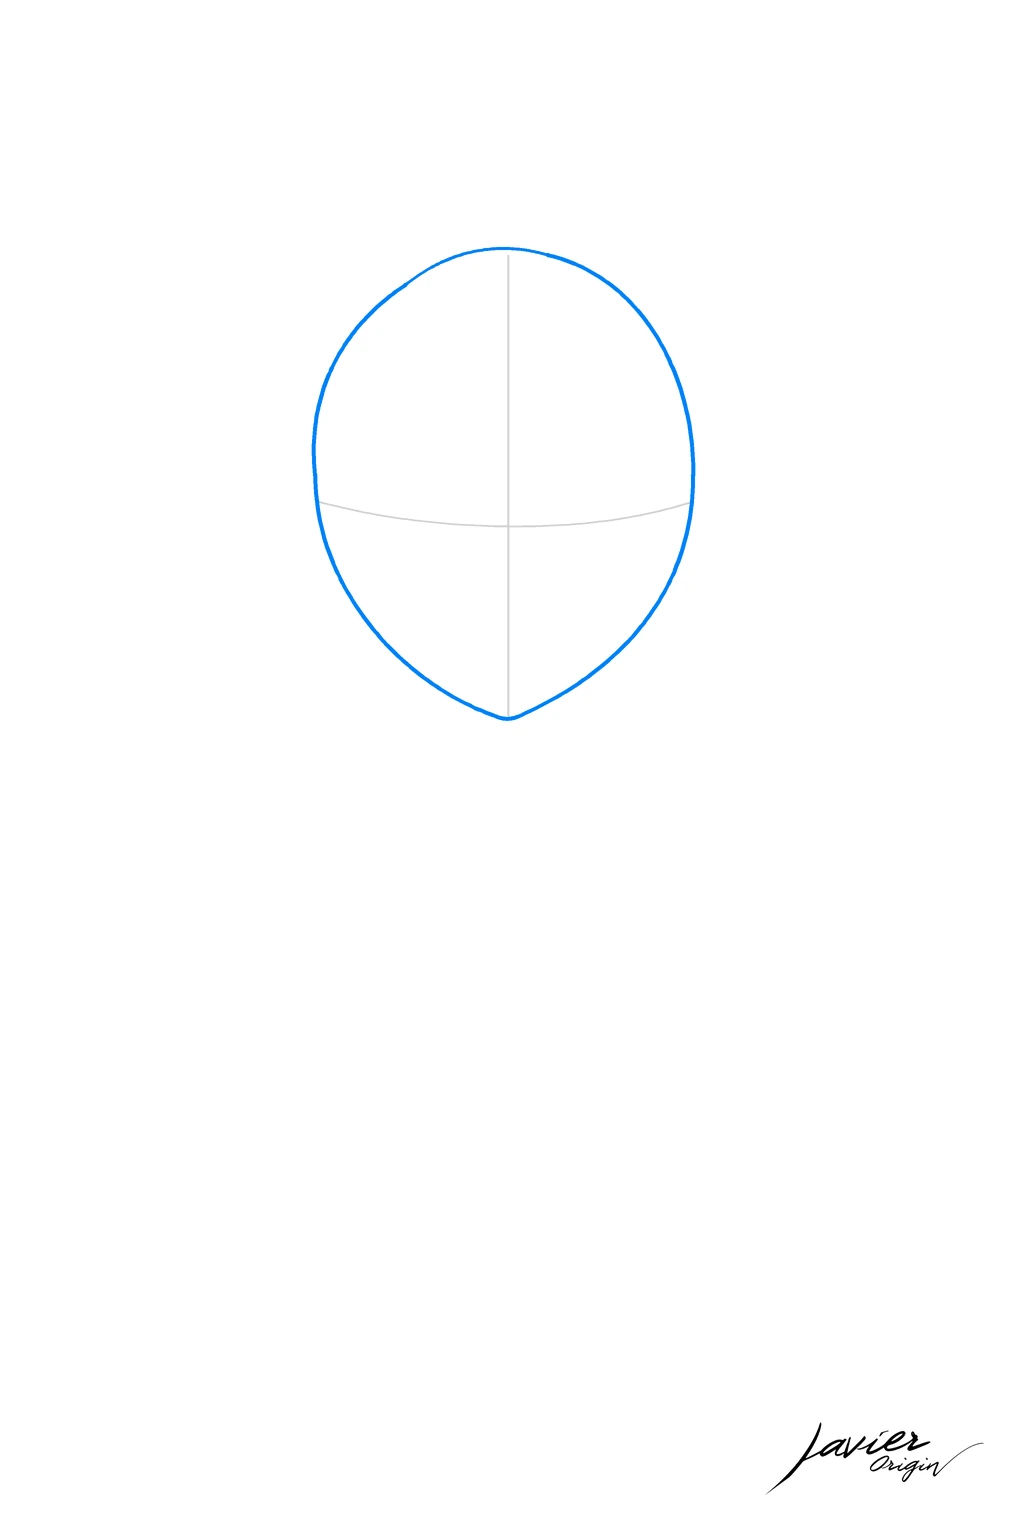
I start with the head shape
I draw an oval that narrows slightly toward the chin. I am not aiming for a perfect line: this base simply helps position the face.
I mark a vertical guide and a curved one at eye level. I keep them light because they will need to be erased later.
Step 2 of 13
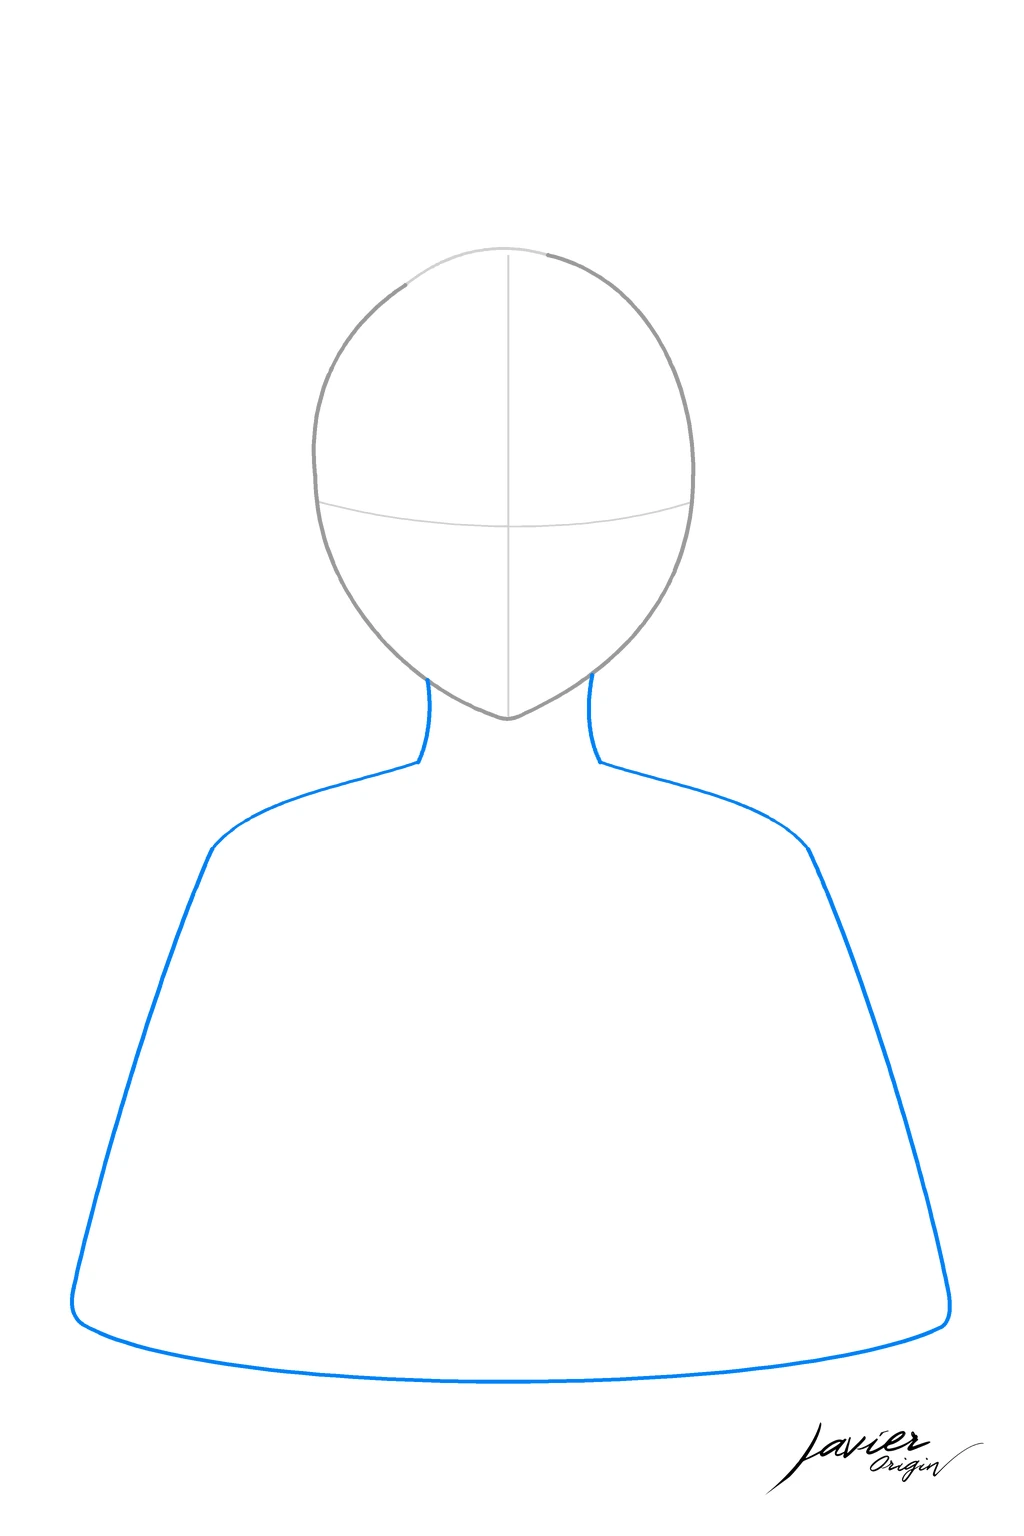
I add the neck and shoulders
I draw two short lines down from the head to indicate the neck. Then I draw the shoulders and a broad shape for the torso.
For now, I leave out the inner clothing details. I want to check that the neck is centered and there is enough room for hair on both sides.
Step 3 of 13
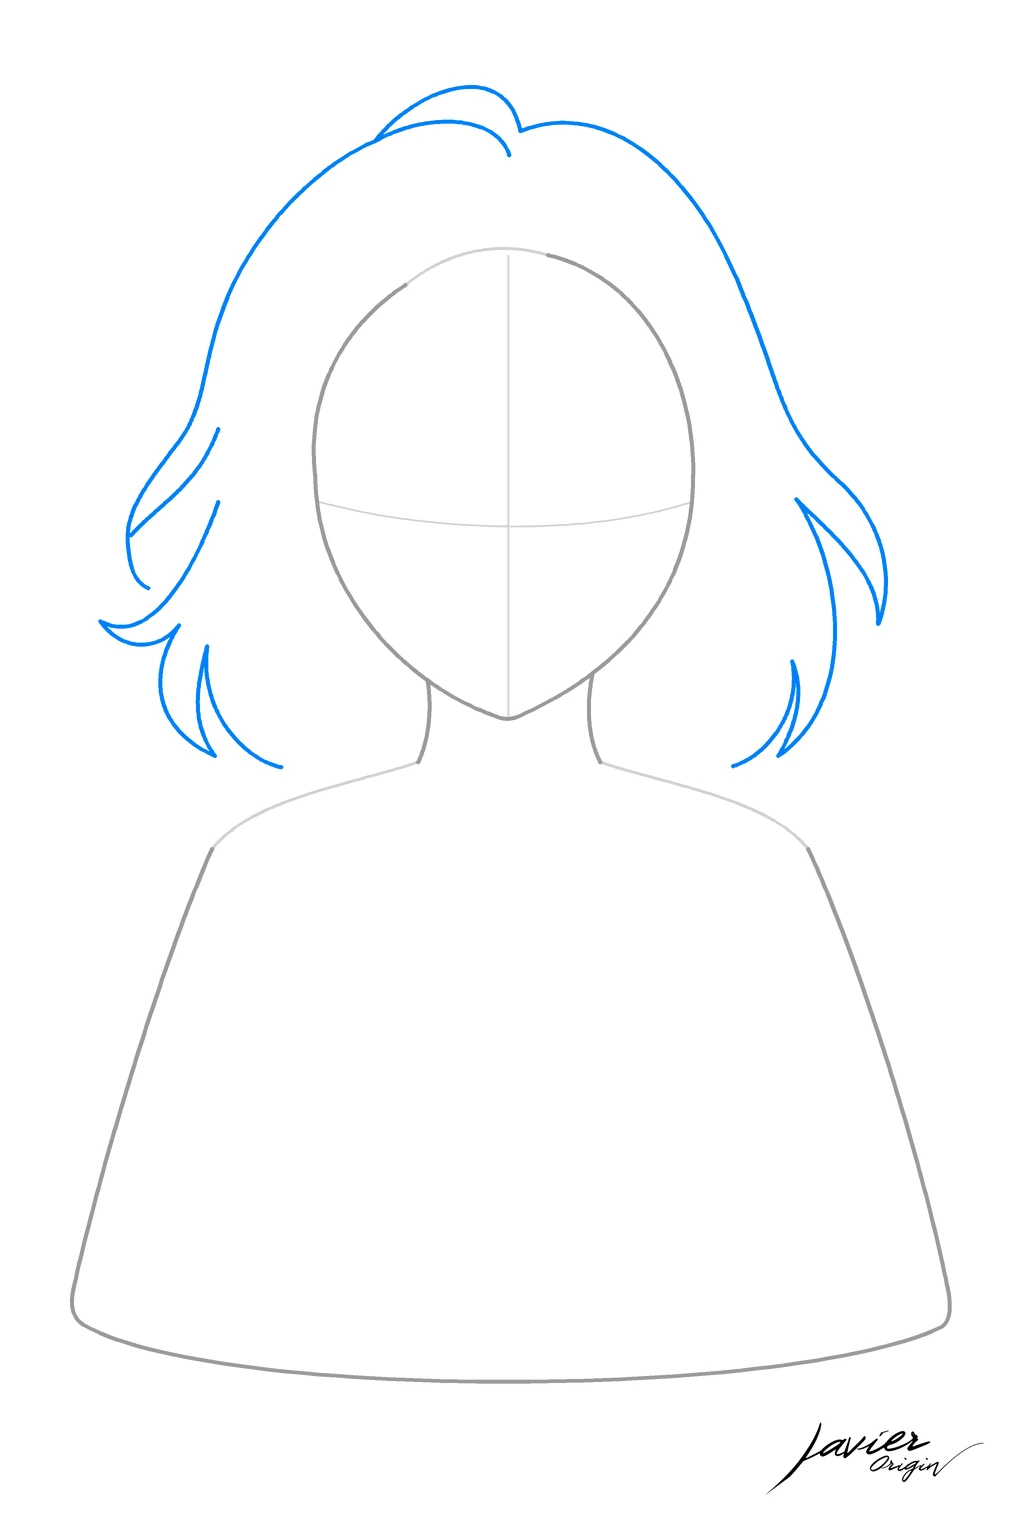
I add hair volume around the head
I surround the head with the hair silhouette. At the top, I leave a loose curve; at the sides, I draw strands that turn outward and return toward the shoulders.
First, I think of the hair as one mass. Small strands come later, once the overall shape is clear.
Steps 4–6
The gaze
I position the eyes and the small features that change the expression.
Step 4 of 13
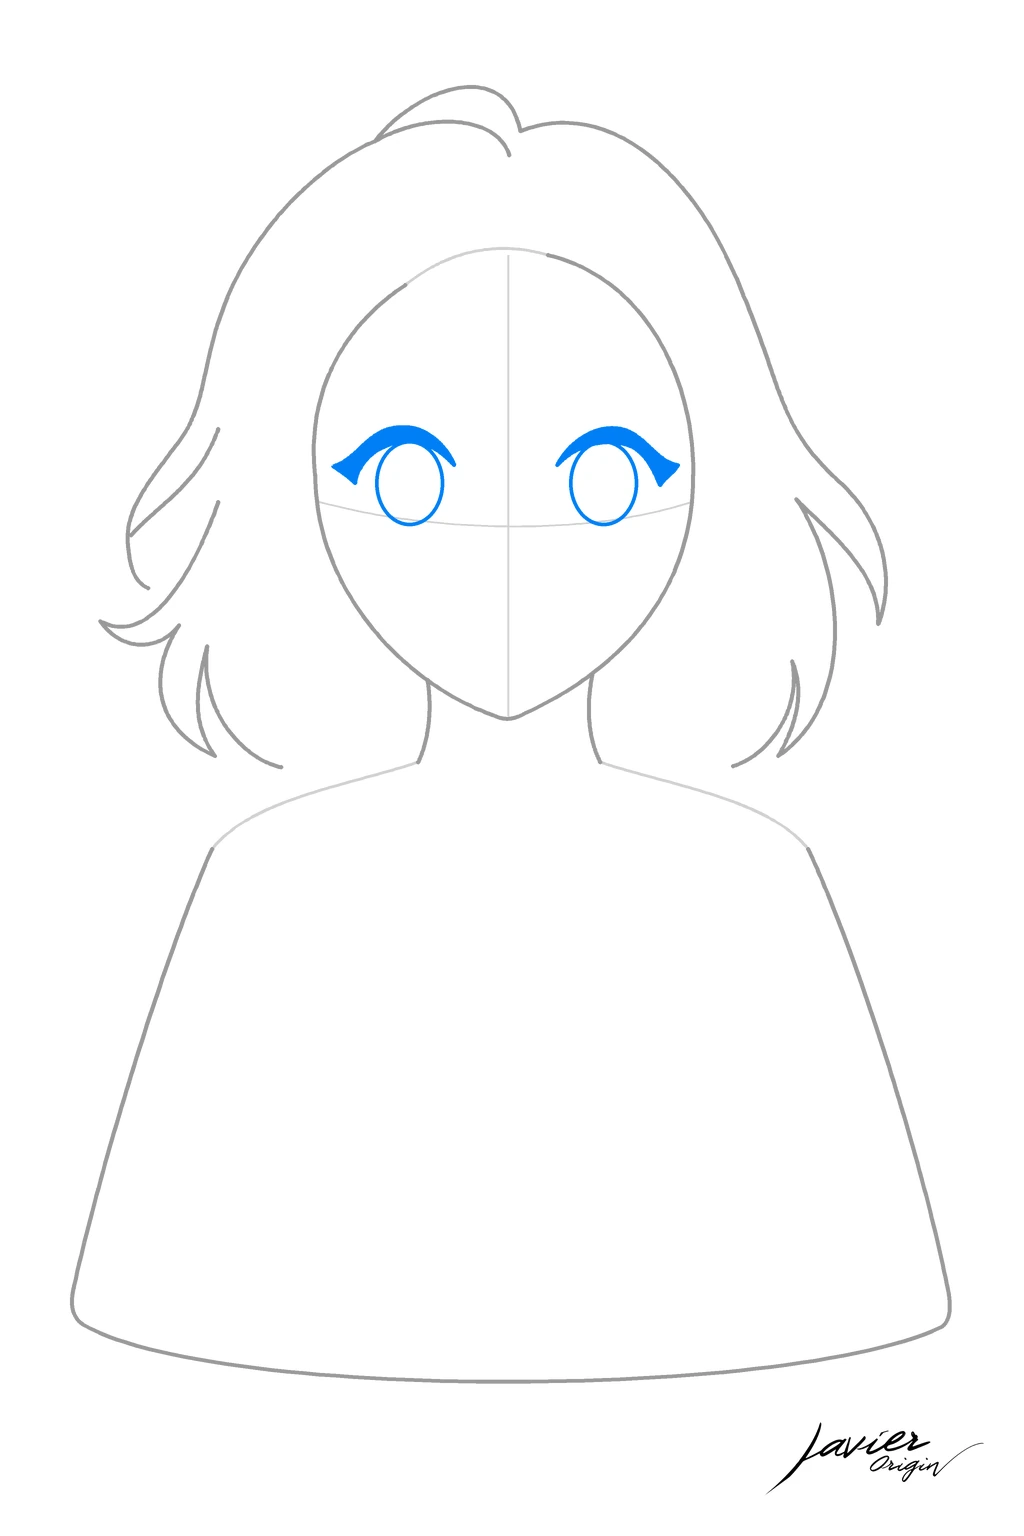
I position the eyes using the guide
I place the two eyes on either side of the center line. At this stage, I focus on their outer shape and the upper eyelid curves.
I compare their height and the space between them. I do not need the irises yet: if something does not fit, I can move the shapes without losing details.
Step 5 of 13
I draw the eyebrows, nose and smile
Above the eyes, I draw two short, gentle eyebrows. In the center, I mark a small nose, then a simple smile a little lower down.
These few lines change the character’s expression. If the mouth is too low, I move it closer to the nose before adding the irises.
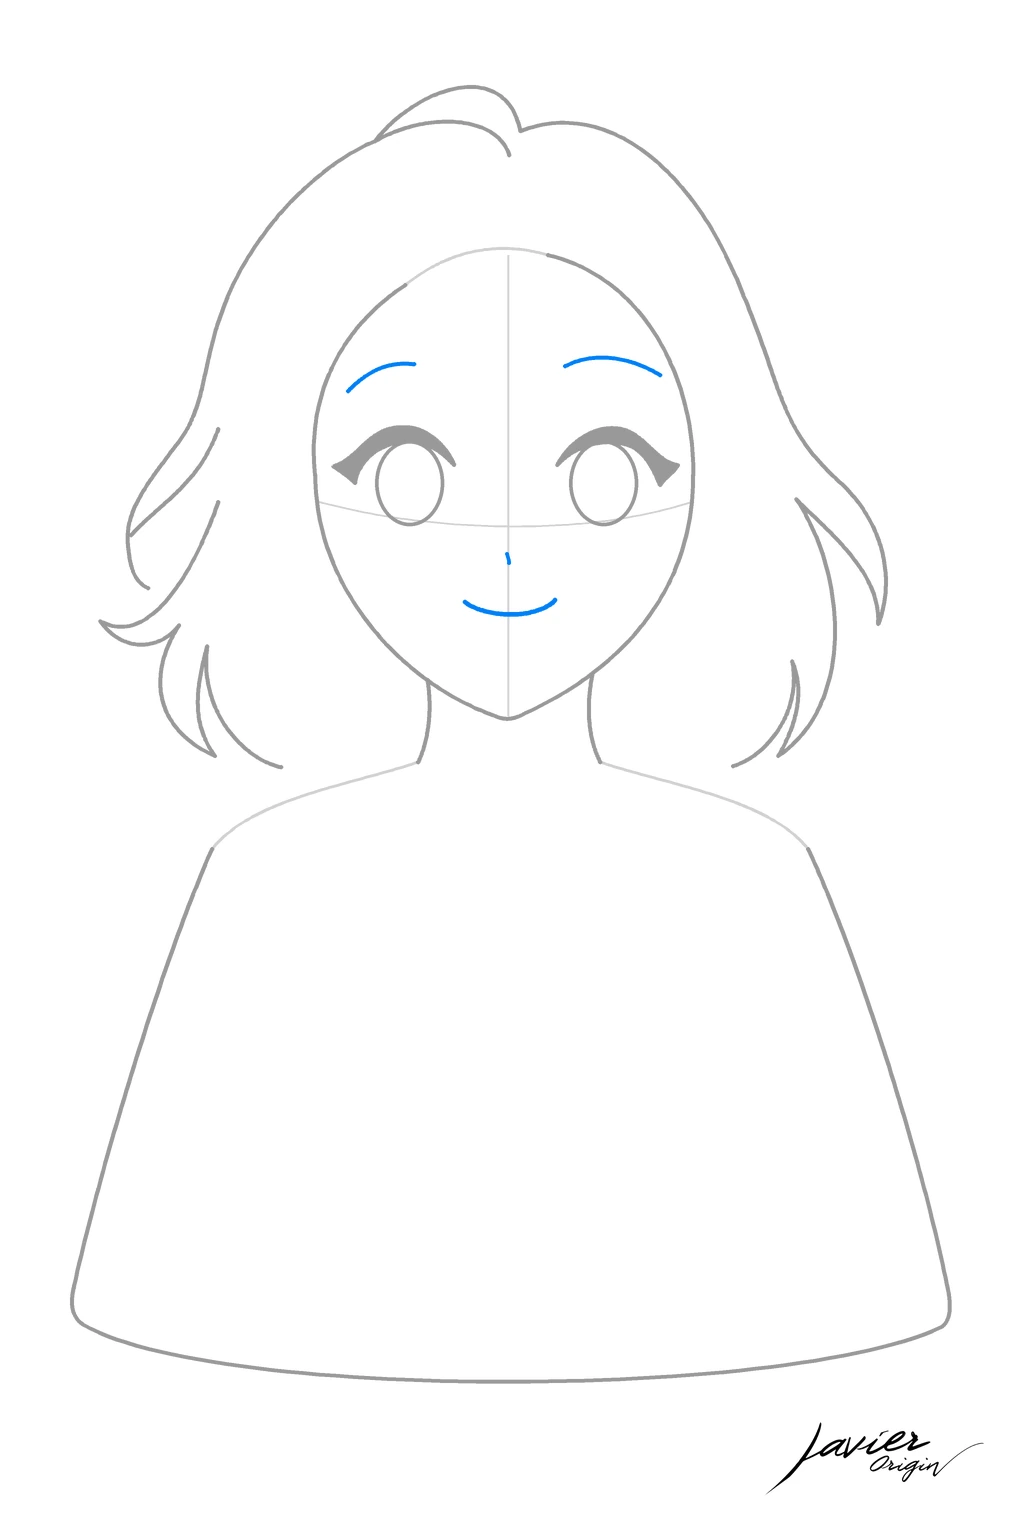
Step 6 of 13
I complete the eyes and preserve the highlights
Inside each eye, I add the iris and pupil. I leave a white area for the reflected light and strengthen the eyelashes without covering that highlight.
I look at both eyes together to check that the pupils point in the same direction. They do not need to be identical, but they should look the same way.
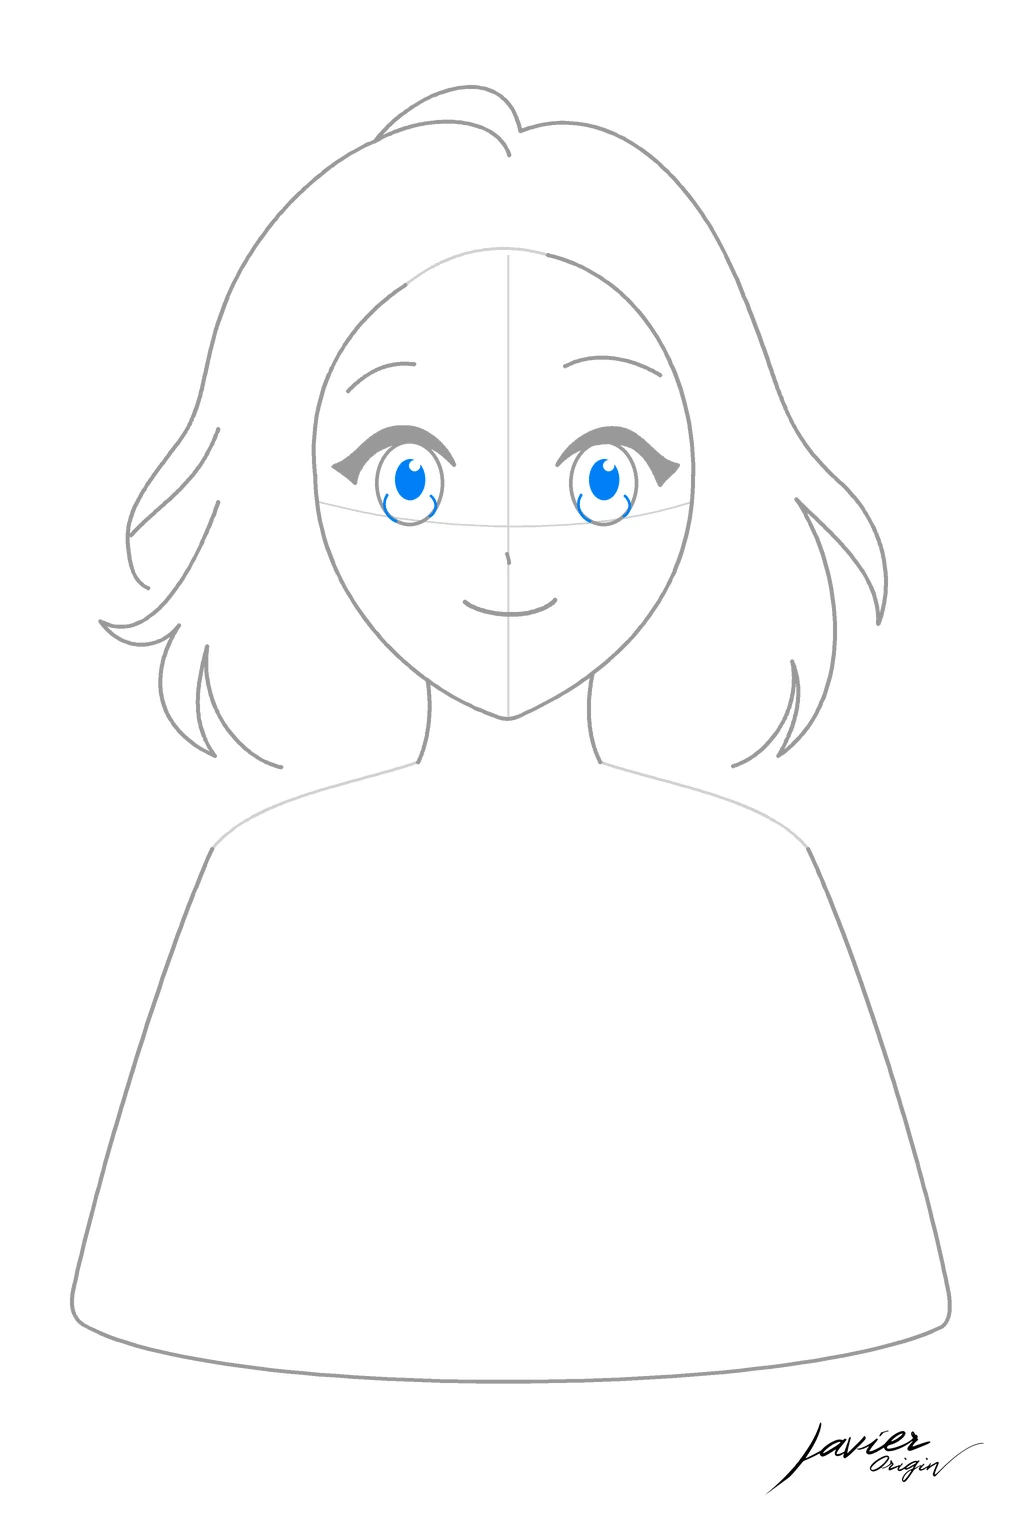
Steps 7–8
The hairstyle
The bangs and star clip give the character personality.
Step 7 of 13
I draw the bangs over the forehead
From the top of the hair, I draw several strands falling over the forehead. I combine long curves with soft tips to give the bangs movement.
Some strands pass in front of the head outline. Once I like their position, I lighten the guides I no longer need beneath the hair.
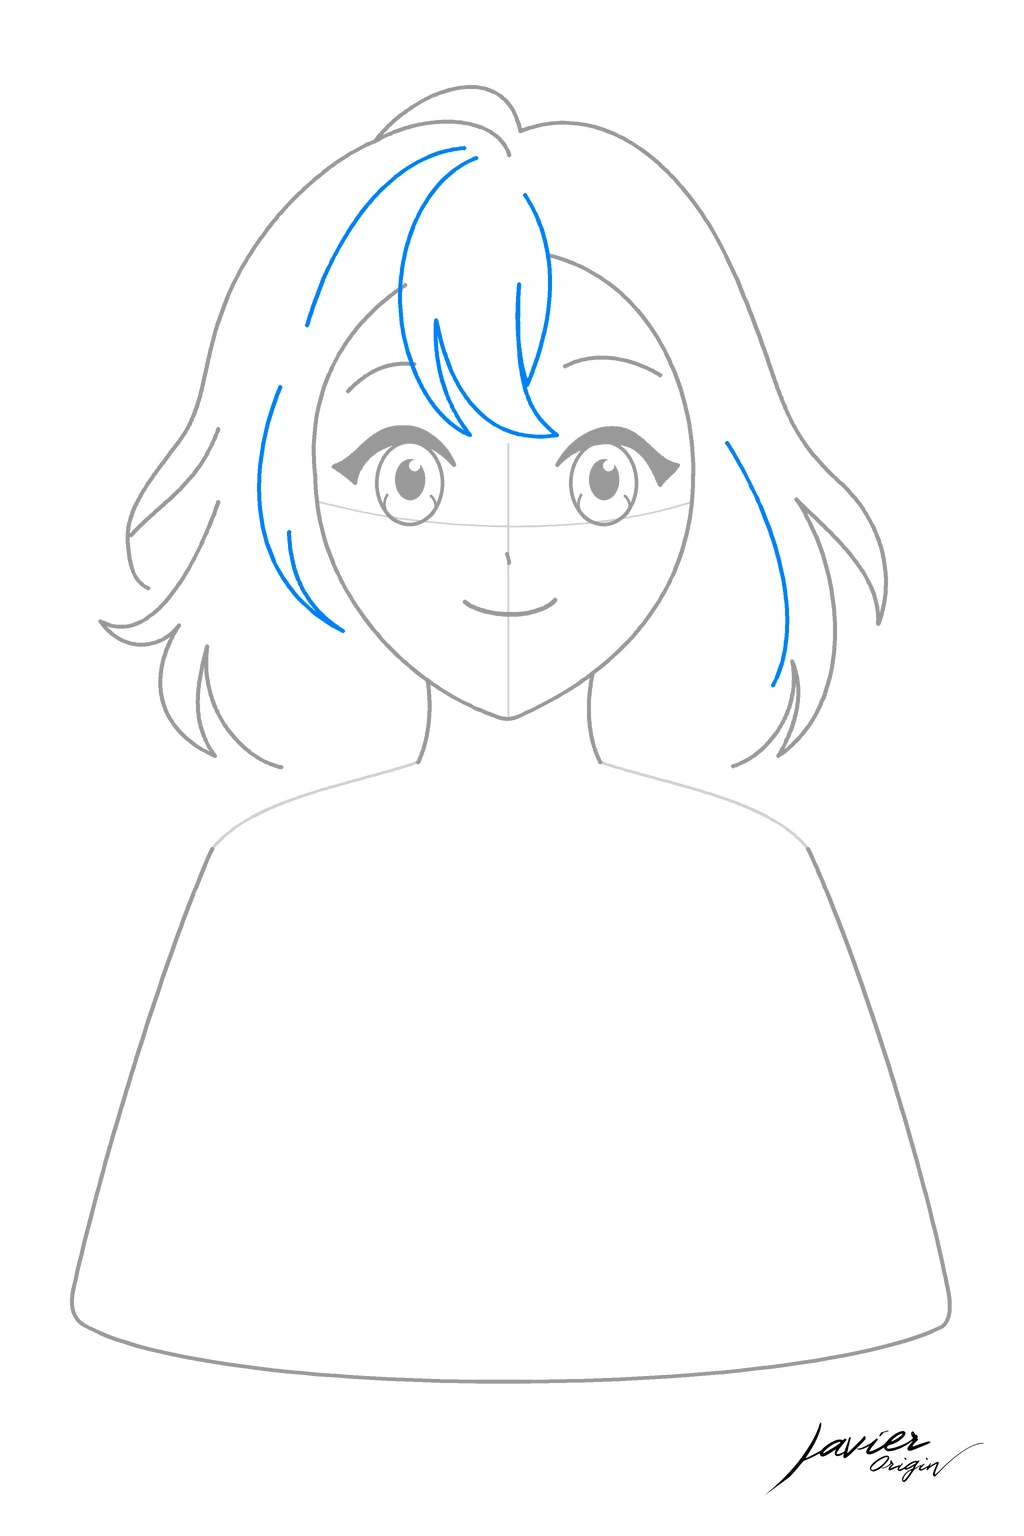
Step 8 of 13
I add the ears and star clip
I draw the ears at the sides of the face, partly hidden by hair. Then I place a small star-shaped clip on the right side of the image.
I check that the star follows the hair’s curve. It is a small detail: it does not need to be enlarged to be recognizable.
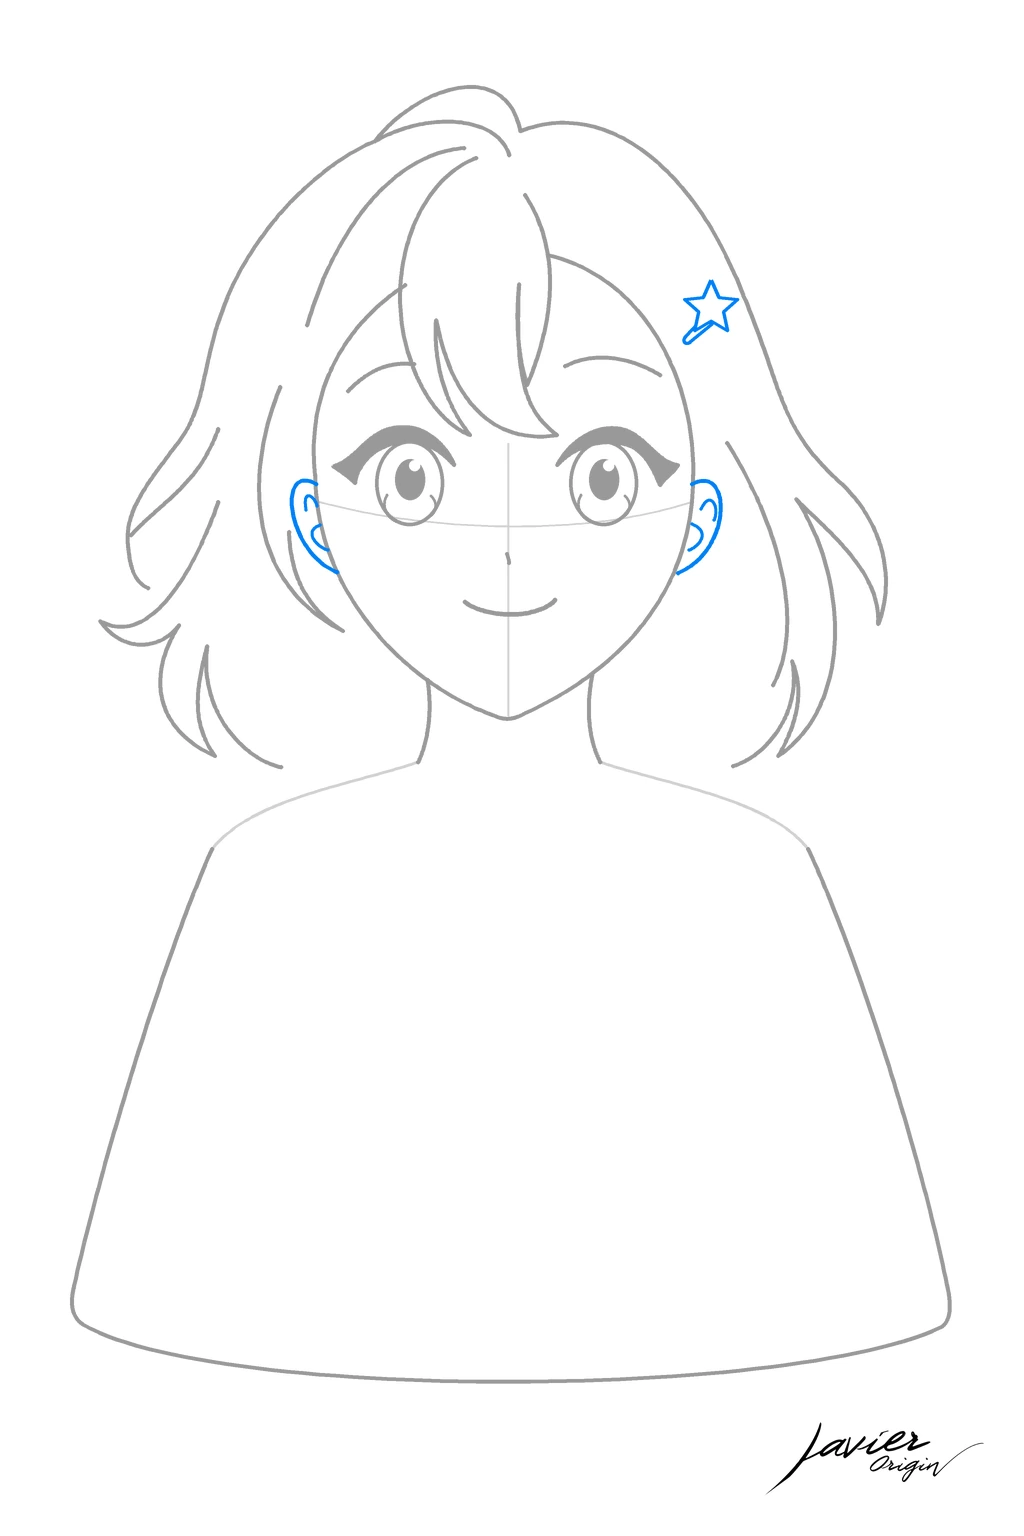
Steps 9–13
The hoodie
I add the hood and sleeves, then clean up the outline and prepare the drawing for coloring.
Step 9 of 13
I turn the torso base into a hoodie
Over the broad torso shape, I draw the hood around the neck. I mark its two sides and the V-shaped meeting point in the center.
The hood sits in front of the body and behind the hair. If a crossing line is confusing, I erase it before continuing.
Step 10 of 13
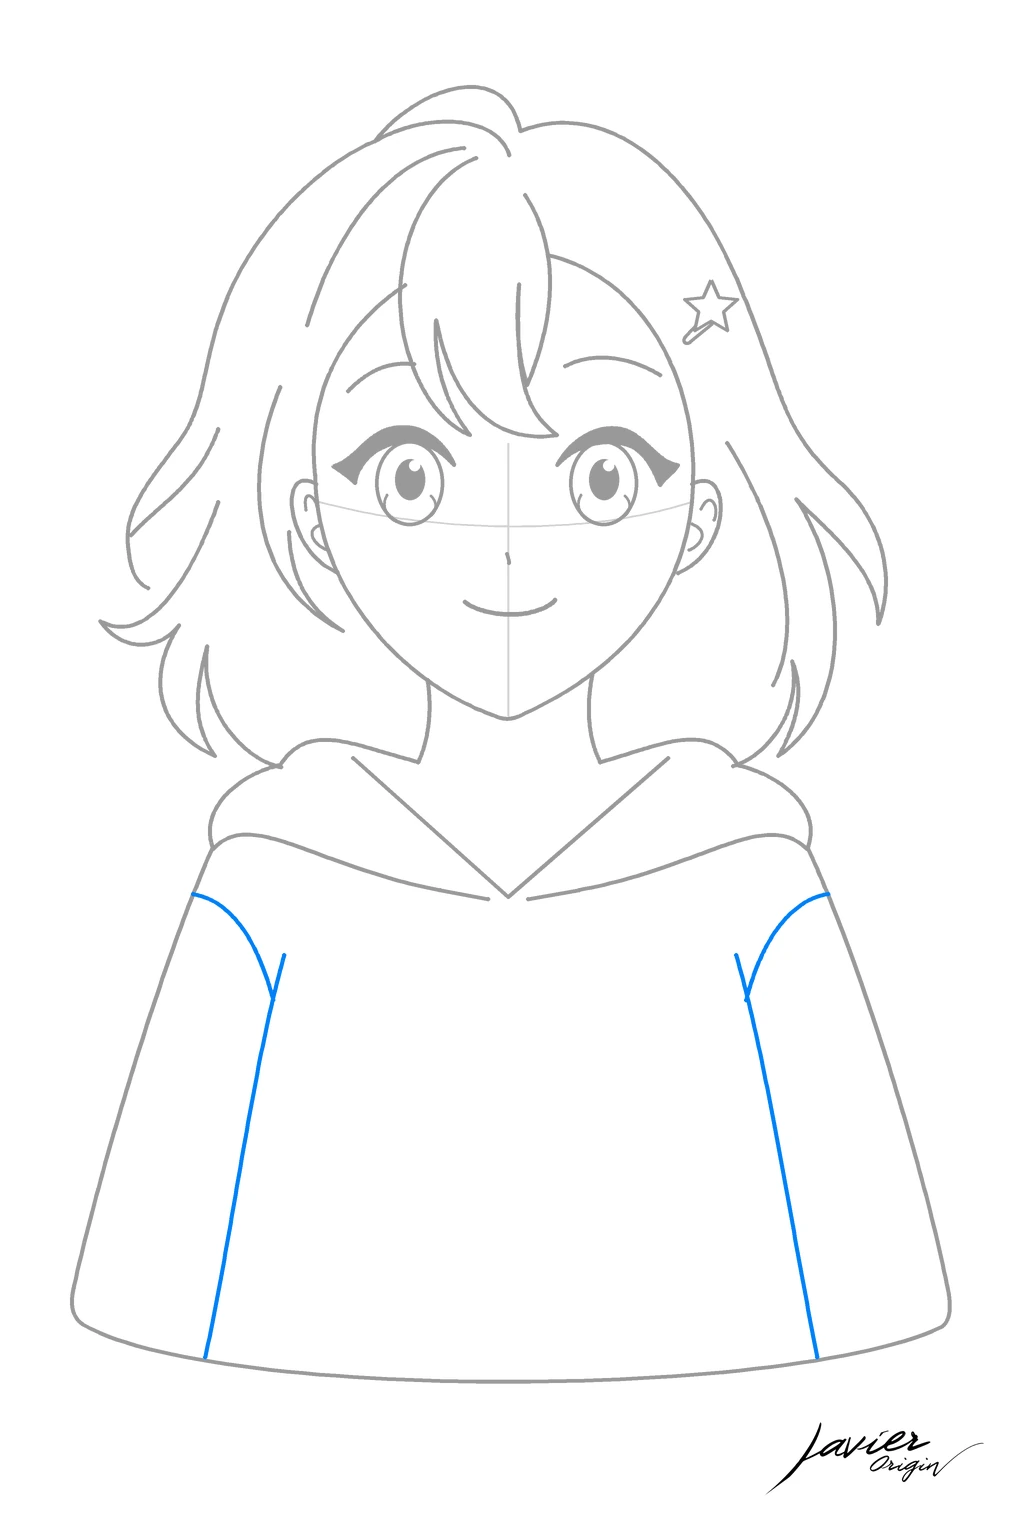
I separate the sleeves from the body
I draw the lines separating each sleeve from the rest of the hoodie. I follow the slope of the shoulders and keep the sleeves loose.
The hands are not visible in this drawing, so I focus on the sleeve shapes. I check that both arms are distinguishable.
Step 11 of 13
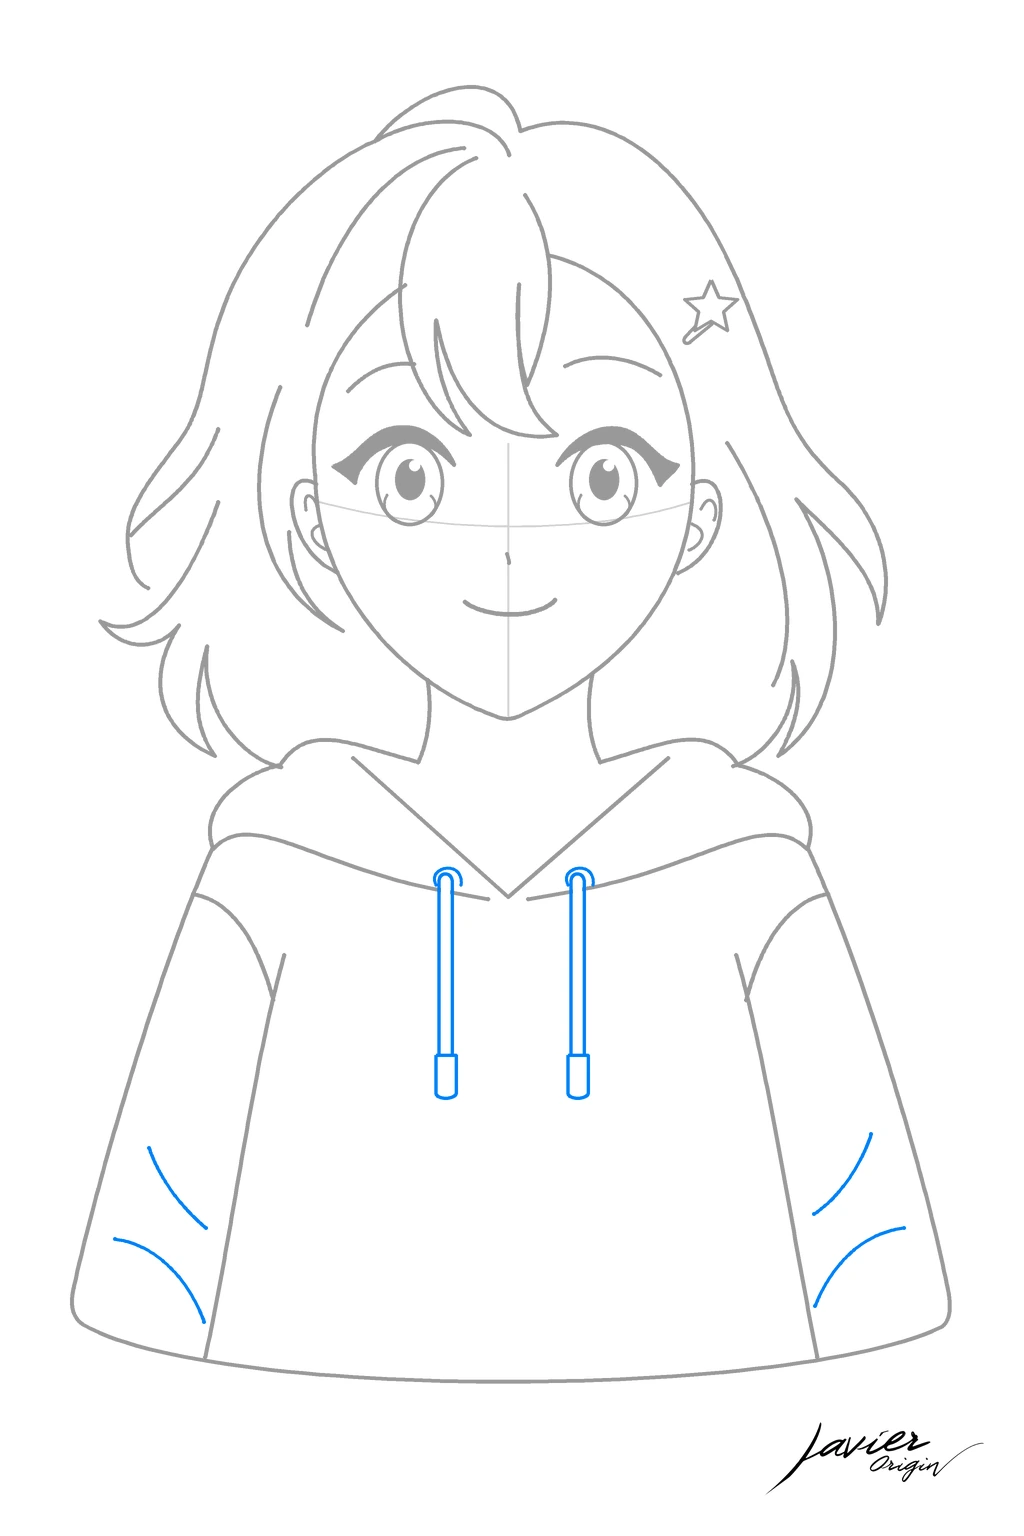
I add the drawstrings and a few folds
From the center of the hood, I draw two thin drawstrings downward and finish each with a small tip. I add a few sleeve folds.
The folds follow the direction of the fabric. I keep them apart so the hoodie stays simple and does not fill with stripes.
Step 12 of 13
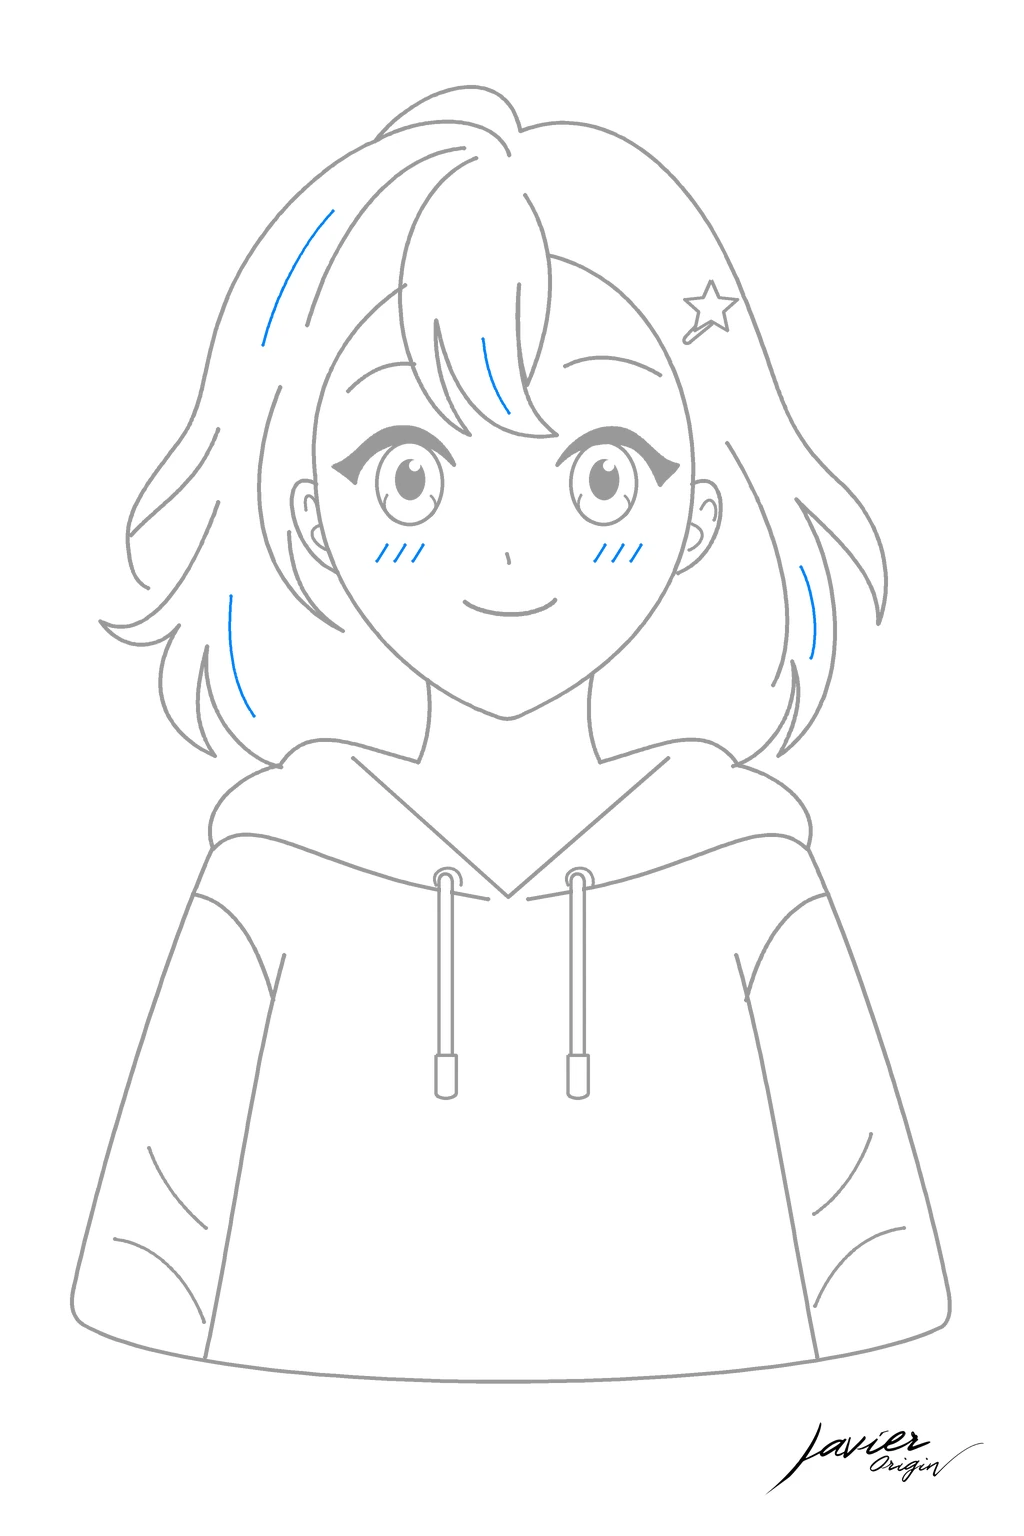
I add the final face and hair details
I draw light marks on the cheeks and a few loose lines in the hair. I use only a few details so the eyes remain the first thing you notice.
I check which lines were only construction guides. I lighten them before finishing so the face looks clean.
Step 13 of 13
I refine the outline and finish the anime girl
I go over the lines I want to keep: eyes, hair, star clip and hoodie. I carefully erase guides crossing the face and check that the drawing reads clearly at a glance.
Your character is complete. To add color, first choose a small palette for the hair, clothing and eyes; this makes it easier to keep everything balanced.
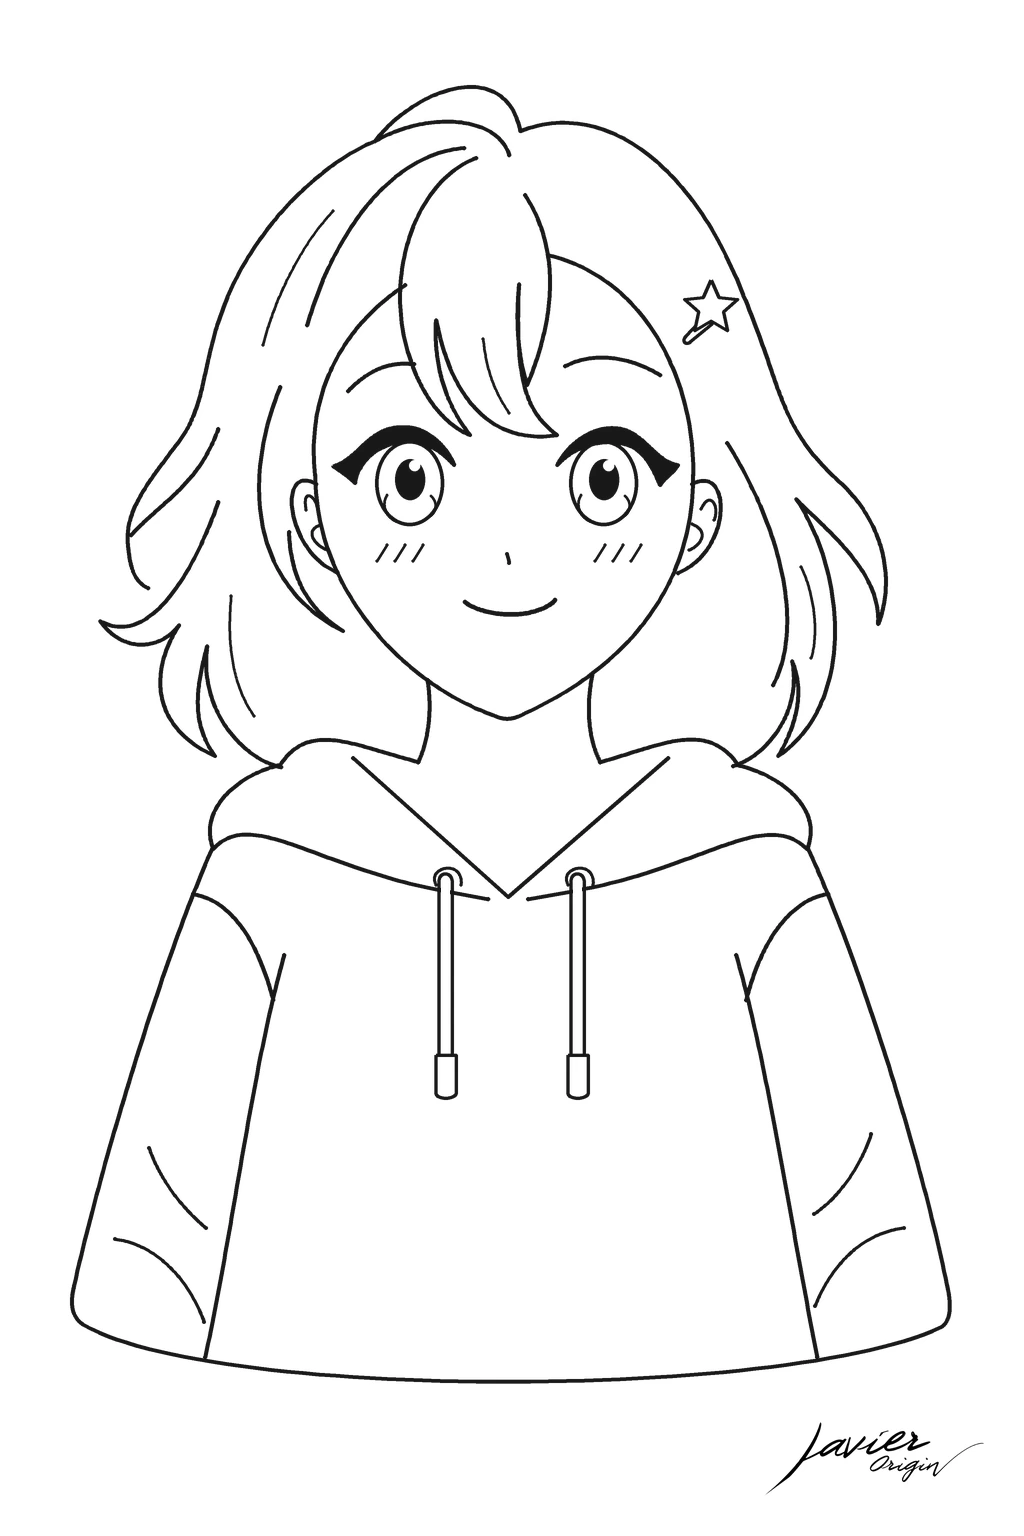
After completing the 13 steps
Try another expression with the same base
A fun way to practice is to draw the head again and change only the expression: raise the eyebrows slightly, tilt the smile or move the pupils. It will look like a different character without starting a new design.
You can also change the hairstyle or hoodie color. Keep both attempts to compare what you tried. If the first did not turn out as you imagined, it still helped you learn where to place each part.
Would you like to color?
More anime girls to keep creating
Here, we have drawn a character from scratch. If you would prefer to begin with color today, choose a page from my anime girl collection. You will also find characters in my digital PDF coloring books; each product page shows examples and its price.
Questions about drawing this anime girl
Why do I keep the face guides until after the eyes?
They help me compare both eyes’ height and spacing. Once the gaze works, I lighten the guides with the eraser and keep only the final outlines.
What if one eye is larger?
Before adding irises, compare both upper eye curves and the space they occupy. Correct with gentle strokes. A small difference does not spoil the expression; what matters most is that they appear to look in the same direction.
How do I draw bangs without covering the whole face?
Start with two or three large strands and keep the eye area visible. Add small strands only when you are happy with the overall hair shape.
Can I draw just the face and leave the hoodie for another day?
Of course. Finish step 8 and practice the gaze, bangs and clip. Return to the hood and sleeve steps whenever you feel like completing the character.
Leave a Reply
You must be logged in (Español) to post a comment.