Layers, pressure and seamless transitions
Blending colored pencils: smooth transitions step by step
Learn to blend two or more colors without leaving a visible boundary. Practice gradual layering, a colorless blender, solvent and burnishing to create gradients, skin tones, shadows and backgrounds with more depth.
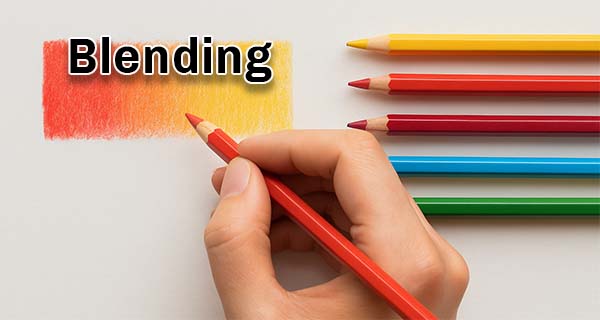
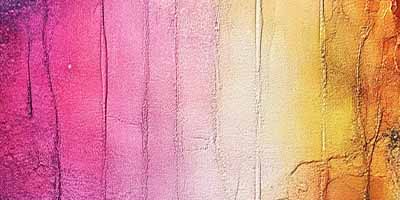
Blending pigment into the paper
What is colored pencil blending?
Blending means combining two or more shades until it becomes difficult to tell where one ends and the next begins.
It involves more than rubbing color. The blend depends on pressure, the number of layers, paper texture, core hardness and the relationship between your chosen colors.
- Smooths transitions and gradients.
- Reduces visible white gaps in the paper.
- Strengthens the sense of volume and light.
- Connects shadows, midtones and highlights.
The four main variables
What makes a clean blend
Before changing brands or buying a tool, check these four basics.
Pressure
Keep the first layers light. Heavy pressure too early flattens the tooth and limits further layering.
Layers
Several gentle applications blend better than one thick, uneven layer.
Paper
The tooth holds pigment. Once it is filled, the paper no longer accepts color as easily.
Intermediate shades
A bridging color, such as orange between yellow and red, reduces abrupt changes.
Materials behave differently
Materials that help with blending
You can practice with any pencil set, but core hardness and paper affect how many layers you can apply and how easily the colors blend.
Quick blending
Pencils such as Prismacolor or Holbein lay down plenty of pigment and make rich blends easier with fewer layers.
- Intense color.
- Quick transitions.
- The paper may fill up sooner.
Controlled layering
Polychromos or Derwent Lightfast allow you to work gradually and preserve the texture for longer.
- More control.
- Precise details.
- Require more patience.
A professional finish
Luminance combines smooth application with pigments designed for lasting artwork and high-quality blends.
- Soft texture.
- Good coverage.
- Useful for key finishing layers.
Paper with enough weight
Use paper of at least 120 g/m² for practice. For many layers, 160 g/m² or heavier paper usually offers greater strength.
Colorless blender
Presses pigment into the paper, reduces white gaps and increases saturation.
Cotton or tissue
Can soften surface pigment, but does not replace layering or create a deep blend on its own.
Five ways to bring colors together
Blending methods step by step
There is no single correct method. Choose according to your paper, pencil and the finish you want.
Gradual layering
Apply the first color with light pressure. Overlap the second in the transition area and alternate between them until they blend.
- Keeps you in control of the color.
- Works with any pencil.
- Allows adjustments before the paper fills up.
Colorless blender pencil
Use it at the end over a blend you have already built. Make short movements that follow the form.
- Reduces visible grain.
- Intensifies the pigment.
- May darken the shades.
Blending with solvent
Apply a minimal amount with a brush or cotton swab over several layers of pigment, then allow it to dry completely.
- Dissolves wax or oil binder.
- Smooths large areas.
- Requires testing the paper and product.
Burnishing
Press with a light, white or matching colored pencil to fill the tooth and finish the last layer.
- Creates a polished surface.
- Increases contrast.
- Makes further layers harder to add.
Cotton and tissue
Rub gently to remove specks and even out surface pigment in backgrounds or broad areas.
- Accessible and quick.
- A lighter effect.
- Does not replace careful layering.
A basic three-color exercise
Practice a yellow, orange and red gradient
Use a strip of paper and imagine it divided into three sections. Orange acts as a bridge to avoid an abrupt change.
The first base
Apply yellow over two-thirds of the strip with circular movements and light pressure.
The bridging shade
Layer orange from the center, reducing pressure as you approach the yellow.
The dark color
Add red at the opposite end and gently work it toward the orange area.
Alternate the layers
Repeat the yellow, orange and red until the bands soften without losing brightness.
The finish determines the tool
Which blending method should you use?
Always begin with layers. Add another tool only when you know which problem you want it to solve.
Gradual layering
Offers the most control for preserving pores, subtle shades, highlights and small adjustments.
Blender or solvent
Helps reduce visible grain once there is enough pigment on the paper.
Burnishing
Use it at the end for reflections, shiny surfaces and highly saturated areas.
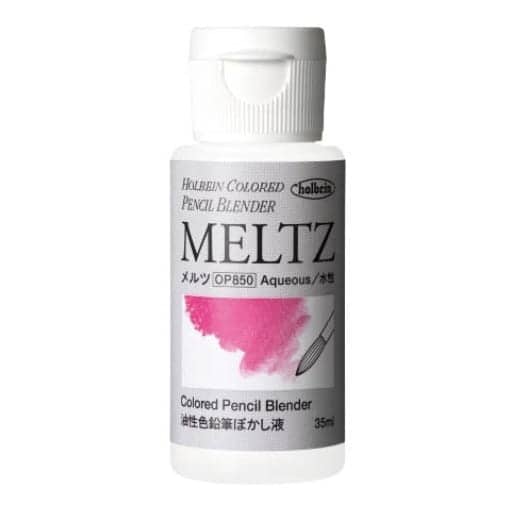
Using solvent with care and control
How to test a liquid blender
Solvent can create a very smooth blend, but use small amounts on a sturdy surface.
Check whether the paper stains, buckles or loses color intensity.
The liquid needs enough color on the surface to move it around.
Do not soak the paper; spread the product gradually.
Do not add more layers until the surface is dry.
Find the cause before adding pressure
Common blending mistakes
When a transition is not working, adding more color without identifying the cause usually makes the result worse.
Pressing hard too soon
The surface becomes shiny and no longer accepts new layers easily.
Using very thin paper
It can crease, tear or become marked when you apply many layers and pressure.
Mixing too many shades
Colors can become muddy when there is no clear layering order.
Not allowing enough drying time
Working on a damp surface can lift fibers and leave stains.
A short routine for improvement
A 15-minute blending practice
Repeat this exercise with different color pairs and compare the results on the same paper.
Make three swatches
Prepare red–yellow, blue–violet and green–blue blends with light layers.
Try three finishes
Leave one swatch with layers only, use a blender on another and burnish the third.
Record the results
Note the pencils, paper, pressure and method so you can repeat the best combination.
Frequently asked questions
Pressure, paper, blenders and solvent
Do I have to use a blender pencil?
No. Gradual layering can create smooth blends without extra tools. A blender is an optional finishing tool.
When should I increase the pressure?
After establishing the colors and transitions. Save medium or firm pressure for the final layers.
Why are there bands between the colors?
Usually, the transition needs a wider overlap, an intermediate shade or several light layers.
What paper is best for practicing blending?
Paper with some tooth and enough weight holds pigment and allows more layers without tearing.
Can I use household alcohol as a solvent?
It is preferable to use products intended for art materials, test them on a swatch and follow all safety instructions.
Are burnishing and blending the same?
Burnishing is a finishing method that uses firm pressure. Blending is the broader process of combining colors and can be done without burnishing.
Keep learning
Related resources
Choose your paper
Compare weight, texture and composition before working with many layers.
Read the paper guideArt supplies
Explore pencils, paper and accessories for dry techniques and blending.
Explore materials (in Spanish)Coloring pages
Apply the technique to animals, fantasy, anime and kawaii characters.
Explore coloring pagesSmoothness comes with repetition
Practice layering before looking for another tool
Choose three colors, prepare a strip of paper and repeat the exercise, changing only the pressure.
Leave a Reply
You must be logged in (Español) to post a comment.